Showing posts with label English Paper Piecing. Show all posts

Wednesday, June 13, 2018

English Paper Piecing Class

In March I taught an English Paper Piecing (EPP) class.  This was in anticipation of a class we had scheduled for Diane Miller, who was teaching a class that used EPP.  We had a class of 15, which is a very nice size of group.  

I learned most of my English Paper Piecing either from reading things on my own,or from SisterStitches, who teaches EPP at her quilt shop in Minnesota.  It seems like she's always working on an EPP project.  


One of the table groups for the class.


To prepare for the class I did some EPP and took lots of photos of the process.  Then I chose photos, made them black and white, and put them into a many-paged handout for the students.  Above is one of the photos.


I put together the above hexagons and put them onto this green background before making it into a pot holder.  Strange, but I can't find a photo of the finished pot holder!  This was the project everyone worked on.  


* * * * *

The photo below shows some more complicated EPP that I did for a class I took five years ago.  You can see the post here.  In this class (which I took via snail mail) we used smaller shapes to build larger hexagons.  


Here is a close-up of some of these hexagons.  One can tell from the above photo that this is an unfinished project.  I still need to make a few more "engineered" hexagons, then make "fill-in" pieces for the sides.


We had a good time during our class.  I showed them how to baste the fabric to the paper shapes with needle and thread, and also how to do it using fabric glue.  Different methods appeal to different people.

Here I am demonstrating the stitching to a student.
The students really enjoyed learning this method, and everyone was very successful.  People were especially happy about how portable this sewing method is.  So it can be easily taken when traveling or when going to a weekly quilting get-together.

Since then, we have formed an EPP interest group which will meet monthly.  That way we can share what we are doing, exchange ideas, and learn from each other.

I'll share some photos of their wonderful work in another post.

Saturday, June 13, 2015

A Box For My Hexie Materials (some of them!)

In some of my hexie supplies I came across this little kit, which included fabric squares and the papers.  So I quickly put it together.  Isn't it cute!!


Back side of the flower.

And I realized when I was looking through these hexie supplies that I really needed a place to corral all of them.  Because EPP has definitely gone from a "I'll try this new technique ONCE" to "Yes, I'm going to be doing more than a little bit of this!"  And I have SisterStitches to thank for getting me into English Paper Piecing.


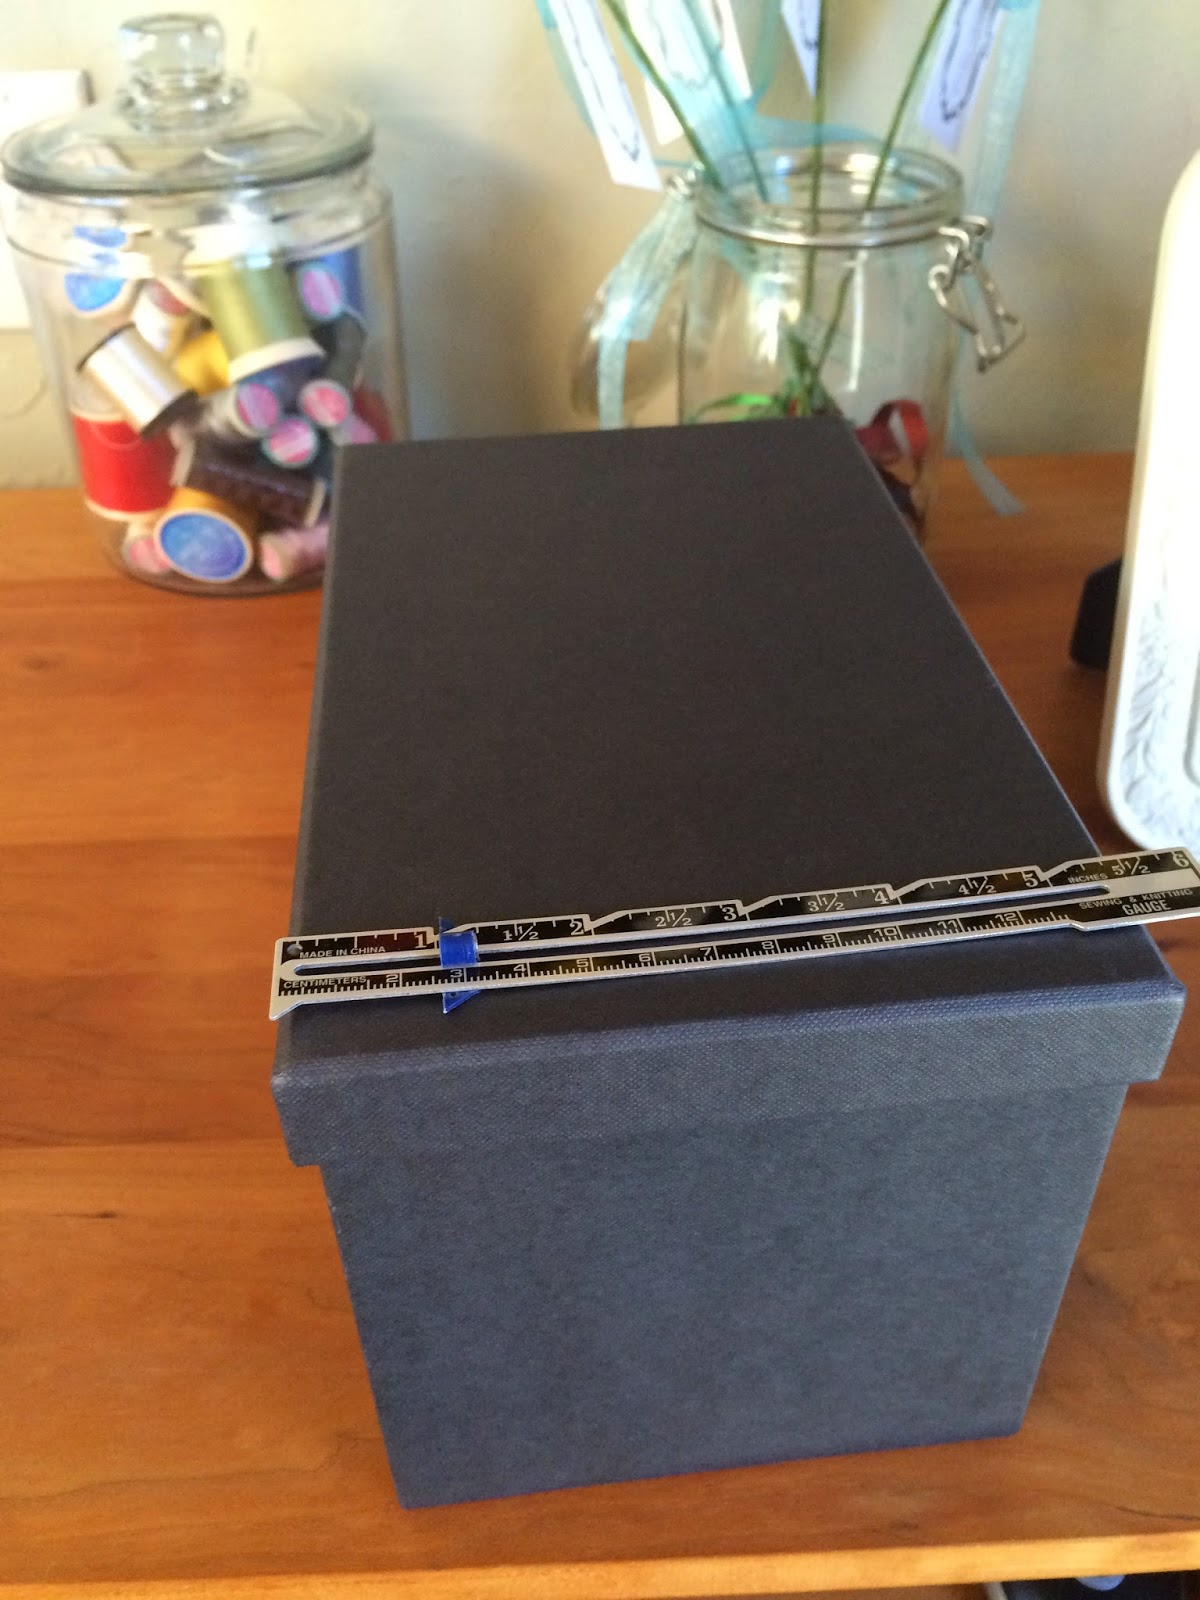
I had this storage box sitting around, not being used.  It seemed like a good size for this project.  As you can see by the ruler placed on top, it is about 5 1/2" wide.


I measured its height, too, and made this little blue fabric base wide enough and long enough to fit the front of the box, with some extra length to fold over the top of the box.

The pins show placement for the EPP flower.


The width of this flower will fit on the front very well.  On the photo above you can see where I've marked with pins just where to place the flower onto the background.


Here is the box with the EPP flower appliquéd onto the background.


I like this "label" for the box so I know what's inside.


And here is what's inside.  These are all the leftover parts and pieces, templates and papers, from 
this project, previously made from a class I took by mail from SisterStitches at The Bear Patch Quilt Company. 


Tuesday, January 27, 2015

Sewing On The Go

How many of you sew while a passenger in a car (or train or plane)?  I found a wonderful idea to facilitate that activity here at the SewManyWays blog.  Check it out.  Karen has so many good ideas on her blog.

It starts out with a kitchen sink sponge holder that attaches to the inside of a sink with suction cups.  In this case, I've attached it to the car window.  (I must add that this works fine, as long as you don't try to roll down the window!)  This receptacle holds many of my sewing necessaries.


A small pin cushion is simply stitched onto the holder through the holes in the plastic.

A fold-up scissors is on a lengthy ribbon for easy use.  When I'm not using it I just place it inside the plastic container.

I think the pink "tape measure" ribbon works perfectly here.  It is just attached with hot glue.  It's only for decoration.  You can also see that the thread comes right out through one of the holes in the container.  I just pull and cut off the length I need.


Below is a top view of the little container, showing how my spool of thread and needle threader/cutter fit inside.  I usually put my little blue Thread Heaven box in here, too.  Or it could be filled with English Paper Piecing papers and fabric squares.  Or thread and a  little cup holding safety pins or clips when sewing down a binding, label, or sleeve.


I should add that this small scissors (and the whole package) passed through airport security with no problem.


Saturday, January 3, 2015

Hexies Are Everywhere!

Hexies (as in English Paper Piecing) are becoming more and more popular.  I keep seeing articles about EPP in magazines, photos on the internet, and it seems more and more people are using this method of piecing.


I recently saw a very nice hexagon pattern in an unlikely place.  At a LuluLemon store opening in a mall near me!


Hexagons really are popping up everywhere!

Saturday, April 26, 2014

Giants Spring Training 2014

Once again, our family headed south to Arizona to go to Giants Spring Training.  It is located in Scottsdale, so we enjoyed the warmer weather and sunshine.  And once again, I had to get a lot of hand-sewing ready to keep me busy for the long car ride.


Here I have yarn for two different projects, English paper piecing hexagons and my sewing bag, a few quilts that just needed labels and/or bindings sewn down and/or hanging sleeves sewn on.  I even had a few embroidered Christmas ornaments that just needed a little work.  I was really prepared this time!


At one of the games we attended, we got to see a preview of Tim Hudson, a new pitcher for the Giants.  Fortunately, MisterStitches was able to get us seats in the shade.  These games can be really brutal if you have to sit in the sun.


I got some more hexagons basted, and ironed them in the hotel room.


I managed to get quite a bit of work done in the car.  I finished the bindings etc on the quilts I took, finished up the little bit to do on the ornaments, made a lot of progress on my hexagons, finished one baby afghan and started another.


The cacti were just beginning to bloom!


Thursday, March 28, 2013

You Know You're A Quilter When . . .

. . . a trip is coming up, and you spend more time planning and preparing projects to take with you, than you do actually planning and packing your clothes.

Recently MisterStitches and I went on a road trip to Arizona for the Giants spring training.  That means two fairly full days of driving on very straight roads.  
Each way.  
Coming and going.  
That means lots of time for hand sewing.  And I really did spend more time and energy on my sewing projects than I did on my regular packing!


The first thing I got ready was an embroidery project.  This one is a secret for now, but I will say that it's for someone in my Stitches family.  I had to buy the object to be embroidered, interface it, then draw on the design with my iron-off pen before we started the trip.


Then I assembled my English paper piecing project.  Which includes the fabric, cardboard pieces, thread, and my needle threader.


Now both projects are stacked on the bed ready to go.


I also have a small quilted wall hanging that only needs its hanging sleeve attached.  I included matching thread and needle pack, plus the label that needs to be attached, too.


So the orange quilt gets added to the pile of sewing projects.  That's the good thing about driving in a car versus flying.  Space isn't an issue, so I can take along as much as I need to.


Now comes the big quilt.  This one is not a super large quilt, probably a large throw size.  As you can see, it needs the binding sewn down, and also the hanging sleeve sewn down.


And so the blue quilt goes on the pile.  Just about ready to go.


And in case I run out of projects (I'm worried that this might not take me as many hours as we will be spending in the car), I throw in the baby afghan I am currently crocheting.


Now I think my stack is complete!  I'll let you know how many projects I finished.


Saturday, February 9, 2013

English Paper Piecing

I'm having fun with English paper piecing (EPP) again.  I'm taking a class by (snail) mail.  SisterStitches is teaching it from the store she manages, Bear Patch Quilts in Minnesota.  I love this class!  Every month I get a nice packet from Bear Patch.  It contains some instructions from SisterStitches (and a recipe and a word-of-the-day and whatever else she feels like talking about!), some cardboard EPP shapes, and the appropriate plexiglas templates for those cardboard shapes.

I started doing some English paper piecing way back here.  Then I did more of it here.


Here are some of the hexagons I've made so far for the class.  I've chosen to use brown and light blue fabrics, with a couple a zingers thrown in alongside them.


When I first started with EPP, I was simply sewing hexagons to each other to make a design (a la Grandmother's Flower Garden).  But in this class I am making the hexagons from other shapes.  That makes it a lot more interesting.


All of our hexagons finish at 2 1/2 inches along the side.  When finished, we will have enough hexagons for a wall hanging sampler.


It's really interesting how I can make different designs by my choice of fabric.  In the above photo you can see how I made some concentric circles by placing my fabric in just the right way.


I'm really enjoying this class (did I already say this!?!?) and look forward each month to receiving that new packet in the mail.  I also have to tell you that SisterStitches is a great teacher!

Saturday, March 3, 2012

Things I'm Learning About English Paper Piecing

I've posted previously about my Grandmother's Flower Garden project here and here. And I've been learning things! Little tricks that make English Paper Piecing easier.


1. Needles Matter

Ever since SisterStitches gave me my first packet of Clover Black Gold needles, I've loved them! I use the quilting needles for quilting (of course!), and the applique/sharps for any intricate hand work. I can't say enough about these needles. They are very fine, and very sharp. When you don't want your stitches to show, as in hand piecing or appliqué, these are the needles to use.


2. Pressing

I press a lot when doing this kind of work. Of course, I press any wrinkles out of the fabric to begin with. That simply makes them easier to handle.


Then I press after I have basted the fabric pieces to the papers. At first I was using a dry iron, but lately I've been using Mary Ellen's Best Press. I like the nice sharp, crisp edges I get on the hexagons. This should lead to better accuracy when sewing two hexagons together.

Ed. 3/20/18  If you are using the glue method to baste, I'm not sure if I would press afterwards or not.  It might make the glue more permanent, that's my fear.  And it may not be as necessary.  But I really like pressing when I'm using thread to baste.


And I also press a section when it is all sewn together, and before I remove any of the papers.


3. Pinning the paper to the fabric


I'm not sure where I read this, but it helps things a lot to pin the fabric hexagon to the paper prior to basting. That keeps the edges a little more even on the back side, making sure that I stay centered on the paper.


4. A small binder clip for holding the hexagons together

This is a great idea! I use a small binder clip to hold together the two hexagons that I am sewing at the moment. As you can see in the photo above, I was able to put this clip off to the side, holding the shapes together and leaving my entire seam open to sewing. Sometimes, however, the clip goes part way on top of the seam I'm sewing. I simply remove it when I get to that point.


5. Thread


Another love I have is for very fine thread. Here is my collection of threads I keep in my English Paper Piecing bag. They are all either Bottom Line by Libby Lehman, or So Fine!, both by Superior Threads. The Bottom Line is a 60 weight thread, and the So Fine! that I'm using is a 50 weight. If your thread takes up less space, presumably you can get a more accurate seam. It does tend to tangle if the tail is left too long, so I have to work with a "tidy" amount of thread.


6. Template for cutting


SisterStitches gave me this idea, which is to cut a plastic template with the seam allowances added for drawing the fabric shapes. Some people simply use a square of fabric to baste to the papers. But I like the neatness of having a hexagonal piece of fabric to baste to a hexagonal piece of paper. The beauty is that you can make the template the size of your paper hexagon plus the "seam allowance" amount that gets folded over and basted to the back of the paper. At first I used a template that added 1/4" to my paper size. But I soon cut another template that had 3/8" added. That gives me a little more fabric to hang onto when I'm basting the fabric to the paper.

Also, an indelible pen is a must. I once tried a ball point pen, which totally messed up my plastic template. And any ink that is not permanent could bleed when it gets sprayed and ironed.

# # # # #

Maybe I'll figure out some more good tricks as I go along. If you have any tricks or tips to share with me, please let me know!