Showing posts with label Halloween. Show all posts

Tuesday, December 2, 2014

The Halloween Costume

Our GranddaughterStitches was a cougar for Halloween this year.  I made this costume from McCalls pattern #MP375.


I was a little apprehensive sewing the costume because I was worried about the fit, not having GranddaughterStitches here to fit it on her.  I had taken pretty detailed measurements of her in August when she visited us.  Given those measurements, I cut it a little longer in a few places.

It turned out to fit her very well.  I think the pattern was great--pretty easy to sew.  It has a zipper up the front of the "jumpsuit."  The hood with cat ears is a separate piece, as are the little mitts, and the spats to cover up her tennis shoes.


With some whiskers and a blackened nose (at least until it got rubbed off!), she was a perfect big cat.  I think she liked the tail the most.


I was fortunate to get to visit GranddaughterStitches at Halloween this year.  I went to school with her and DaughterStitches (aka 2nd grade teacher).  I helped out in DaughterStitches's class most of the day, on the day of the Halloween party.  I also visited GranddaughterStitches's classroom, and ate lunch with her.  It was really fun to see all the kids and teachers in their costumes.  DaughterStitches lent me her witch's cape and large hat so I had a costume to wear, too.

We all went out for trick-or-treating together, along with some other neighbors/friends.  It was a very fun night, even if it was sprinkling a little.

Tuesday, November 12, 2013

A Butterfly Shirt for GranddaughterStitches

We were excited to go visit GranddaughterStitches (and her parents) over Halloween.  It was fun to spend Halloween in her kindergarten classroom with her, seeing all the kids in their cute costumes, and to witness the excitement in the whole school.  It was also great to be able to assist in DaughterStitches's 2nd grade classroom.  The whole school was decked out in costumes!

Anticipating our visit there, I embroidered a little pink t-shirt for GranddaughterStitches.  I found a pattern on the internet (can't recall where I found it) for a redwork butterfly embroidery.  So I used that pattern, but added my own colors to the butterfly.


Here is a close-up of the butterfly.  I used blue, light green, and light blue for the colors.  Everything was sewn with backstitch except for the dots, for which I used satin stitch.  I backed the embroidery area with a nice soft fusible web to stabilize the embroidery.

It actually went quite fast, and I soon finished the embroidery.  Then I thought, "That was too easy.  I need to do something more."  


So I moved on to the bottom of the t-shirt and proceeded to make little embroidered flower and leaf motifs.  I added some colors to my palette for the flowers!


And here is GranddaughterStitches wearing her new pink butterfly shirt.  
I think it suits her just fine.


Friday, October 11, 2013

A Scary Ghost Story

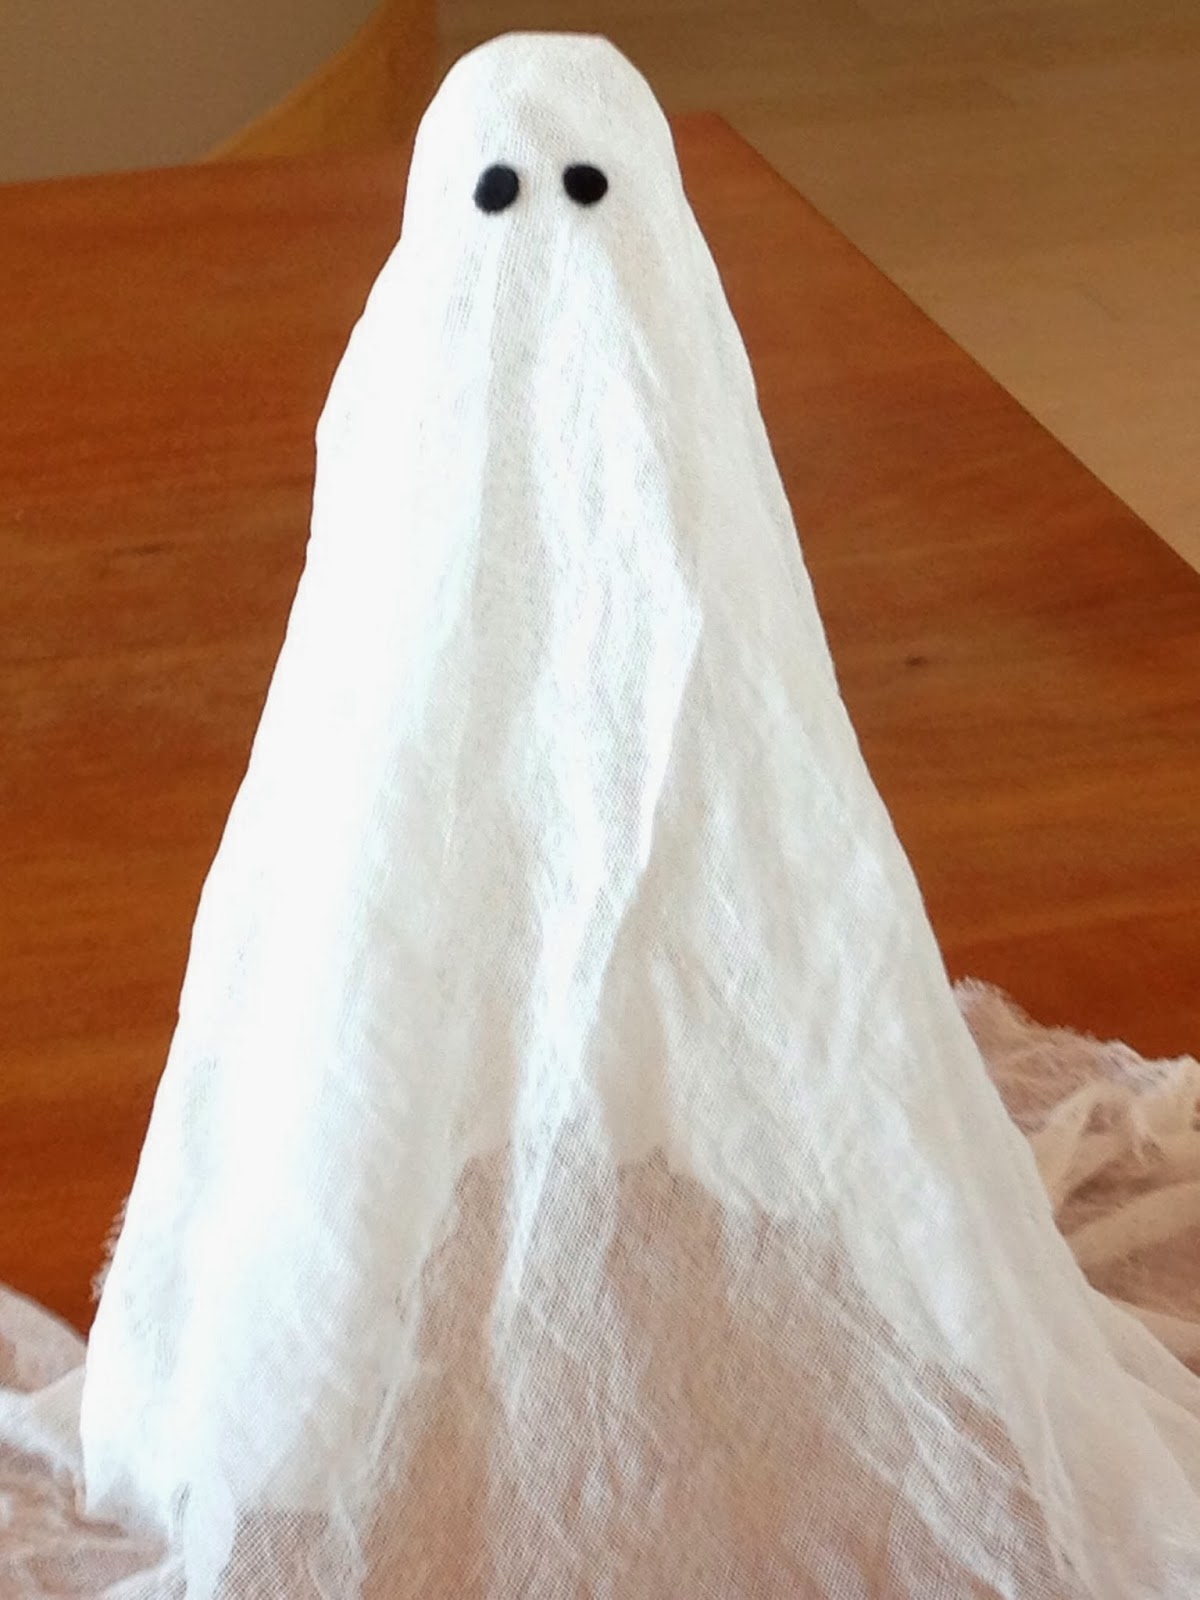
Booo!  Here is a scary ghost that I made yesterday.  It was very easy, and I'm going to tell you how to do it, if you don't already know.


The key ingredients are 

1.  cheesecloth

2. Stiffy fabric stiffener

3.  a form around which to fashion a ghost (I used a water bottle)

4.  plastic wrap


Thanks to Marva at my local quilt shop, I made this simple ghost.  She gave me my directions. I used a water bottle for the basic form.  I then made a "ball" out of tin foil for the head, but you can use anything round-ish.  I started with a small sea urchin shell, but it kept falling off the water bottle!

Cut an approximate square out of the cheesecloth.  It should be big enough to fall over the bottle/form and drape nicely around at the base.  I tried my best to keep the tin foil ball from falling off the  bottle top.  Marva told me that I should cover the whole thing (underneath the gauze/cheesecloth) with plastic kitchen wrap to keep the fabric from sticking to the base/form.  Following the bottle directions,  get all of the cheesecloth wet with the Stiffy fabric stiffener.  (I bought my Stiffy at a fabric store.  It cost me $8.99 for 8 ounces several years ago.  I still have a little over half of the bottle left.)

Here is the fun part.  Drape the damp cheesecloth over the form.  Make sure that the bottom "skirt-like" part is draped around nicely.  I did this on top of my washing machine.  I suppose any counter  top would work fine.  Get all the folds evenly spread out at the base of the ghost.  

Now you are going to have to spend some time doing something else fun while this dries.  Go sew on another project.  Take a walk.  Clean out a drawer.  (No, that's not what I did!)  Have a glass of wine.  (Closer to what I did. . .)  It will take an hour or more. 

When it is all dry and stiff, carefully peel the bottom part off the counter top, then gently pull the base (water bottle) plus the plastic wrap away from the cheesecloth.  You will be left with a graceful, draping shape.

Now all you have to do is add eyes.  I simply cut two small circles from black felt.  Googly eyes would work well, too, I think, and I'm sure there are other possibilities.


Now you have a nice ghost shape.  Here you can see it sitting atop a cute Halloween table-topper that SisterStitches made for me.

Happy Halloween!
(and may all your leftover Halloween candy be your favorite kind!)


Saturday, October 31, 2009

Halloween

As I've been out walking around in San Francisco today, and even yesterday, I saw many, many strangely-dressed people. Some far out costumes. And I think it begs the question:

Which is more insulting? To be complimented on your costume when you're not really wearing a costume?
Or to be wearing a costume and have no one notice?

Because I've seen a lot of strange clothes these last two days, but it makes me wonder if some of the outfits I've seen are really Halloween costumes, or are they just normal clothing for people? On some of the other 364 days of the year, I could swear it's Halloween, by the looks of some of the clothing I see!

Thursday, October 22, 2009

Fairy Costume, Completed!

Hooray! I'm finished with the fairy costume for BabyStitches! Doesn't she look cute?!?
Now I'll show you some detail photos of this project.

There are eight petals that each have a pleat in the center, and are stitched around the waistband of the skirt.

The pattern said to use grommets for lacing up the sash in the back. But I didn't have any, so I just sewed some really small buttonholes, and that worked just fine!

The wings were really something to sew! Between the two layers of sheer fabric are two layers of stiff crinoline. In retrospect, I would have used a different method to achieve this, but the pattern said to sew the fabric right sides together, with the crinoline sewn in there as a lining. Now, I want you to look at that shape above and think about having to turn that sucker inside out when most of it is stiff crinoline!
Yes, if I were doing it again, I'd turn under the raw edges of the sheer fabric, and then sew them wrong sides together, with the crinoline inside. That way I wouldn't have to turn it inside out.

After the wings were together, I had to mark the fabric (with removable pen) on the lines they had given me,
then arrange chenille stems on those lines (overlapping when needed),
and then zig-zag them down with invisible mono-filament thread.
Except that the invisible thread is kind of a pain to sew with,
and broke way too often,
I think the wings turned out pretty well.
They attach to the back of the dress with eight-inch-long velcro strips.

When BabyStitches tried on the costume, she kept turning in circles, trying to get to her wings! What a sweetheart she is!


Even though I complained about the fabrics and the pattern a lot, I really loved sewing this for her. I wouldn't have had it any other way.

Tuesday, October 20, 2009

Halloween Costume (cont)

Here is BabyStitches, trying on her Halloween costume, part way through the sewing.
(She still has her little blue jeans on underneath the costume!) Looks like it might fit. I still have a ways to go, though, and these fabrics are a pain to work with! (See earlier post.)

I'll keep you updated.

Thursday, October 15, 2009

Fairy Costume

I'm a very lucky grandmother right now, because I am in Seattle helping to take care of my granddaughter, BabyStitches, for three weeks. It is really a treat for me. She is 18 months old now, and running everywhere. She's really a lot of fun. We dance and play silly games and play with toys, and play with the dog, Nala. We go to story time at the library on Thursday mornings, which takes me back to when I used to take my own kids to story time, and what a treat it was for us all. When it's not raining we go outside and scribble with chalk on the sidewalk, or throw a ball for Nala, or pick up small rocks and move them all over the yard. Everything is fascinating to BabyStitches.

The other side to the story is that--it is really exhausting!!! Taking care of a child is really hard work, so I guess it's another good reason for not having babies when we're in our 50's. Besides the fact that we would put them down and forget where we put them...

DaughterStitches asked me if I would mind sewing a Halloween costume for BabyStitches while I am here, and of course I said I'd be glad to. The pattern we're using is Simplicity 0544, shown below. BabyStitches is going to be a fairy for Halloween! A pink fairy!
Sewing this costume is rather a departure for me. I used to sew clothing, and use all kinds of different fabrics, but now I do mainly quilting. With good, solid cotton fabric!
For this I'm using tulle, and sheer fabric, and satiny stuff--fairly messy fabrics.
They are flimsy,
they shift around,
they ravel,
and they melt even when the iron is set on the coolest setting!
For the bodice I had to re-sew it three times because I melted the first two attempts.

But here is BabyStitches, trying on the bodice to her fairy costume. (That's Nala, my grand-dog, behind her. You'll see more of Nala soon.) I hope BabyStitches doesn't grow too much in the next two weeks or the costume won't fit her!