Showing posts with label quilting. Show all posts

Saturday, November 25, 2017

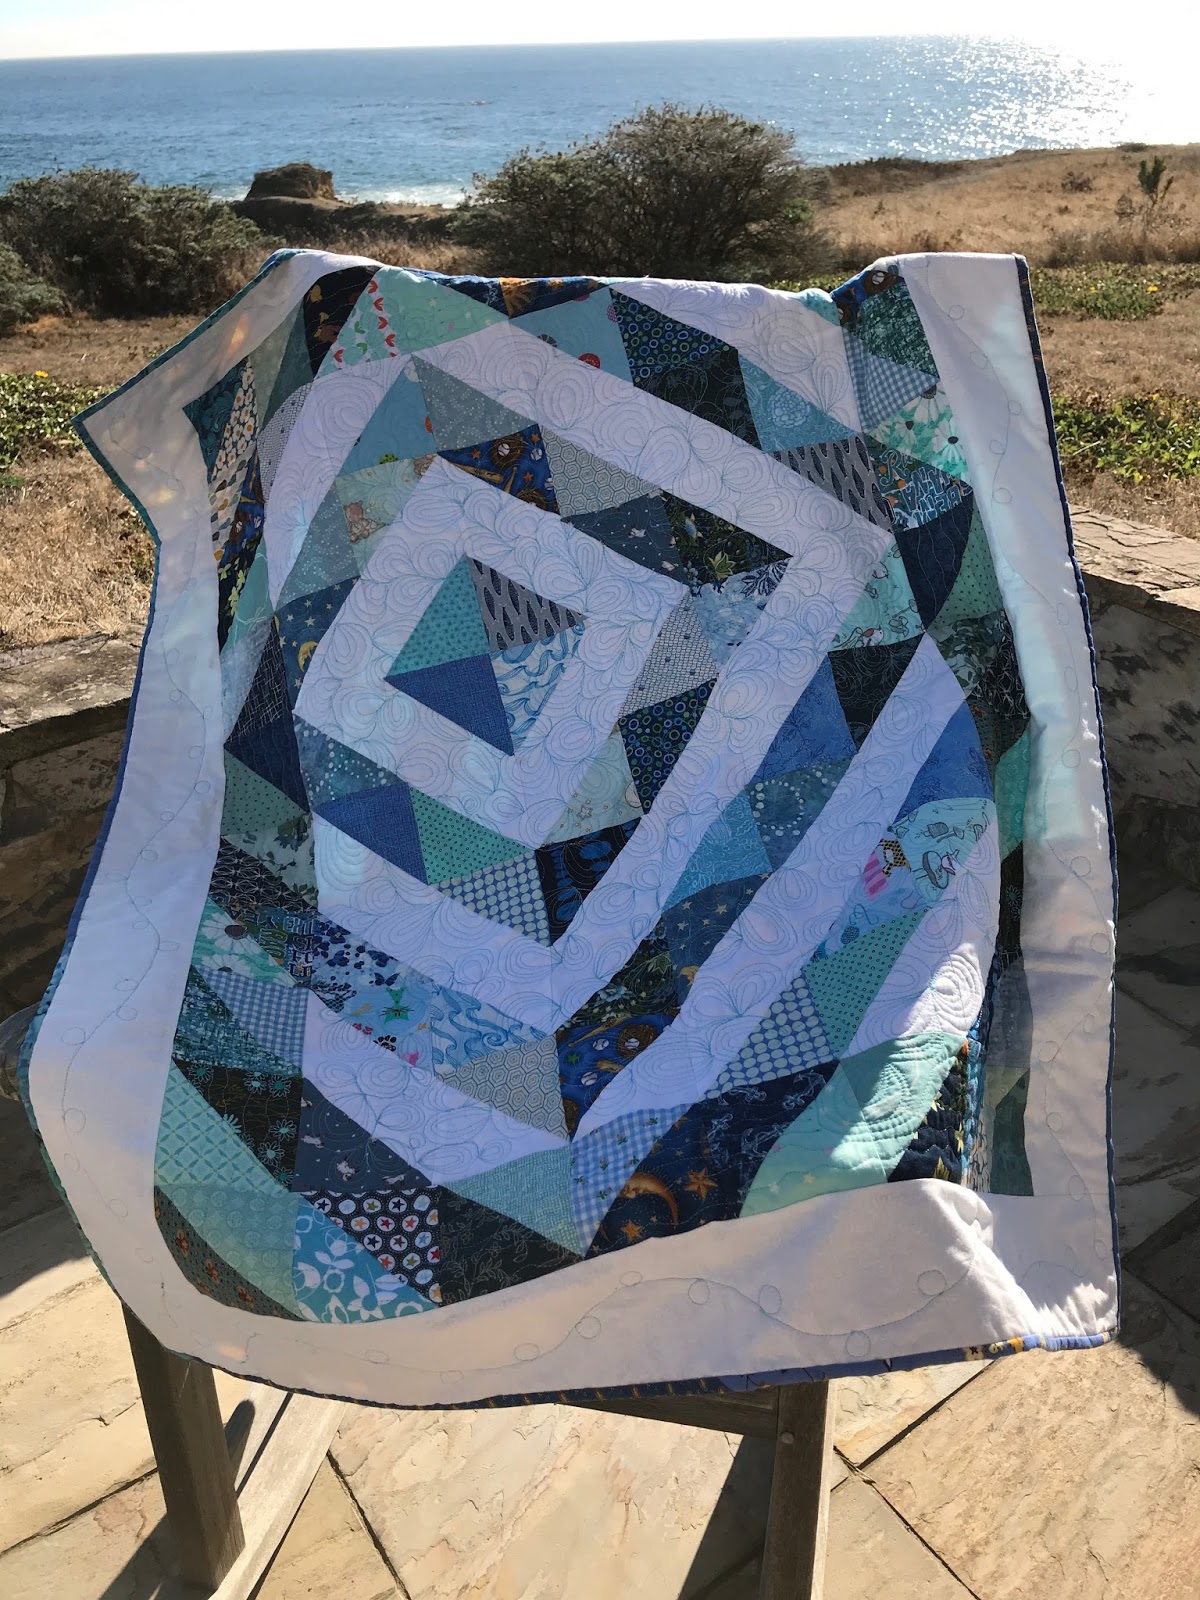
A Quilt For Little Hudson

I have another NieceStitches who had a baby this summer, a little gentleman named Hudson Robert.  Isn't that a nice-sounding name?  I love it!

I chose to do half-square triangles for this quilt.  What a surprise!  I paired blue and white squares for the main part of the quilt.  And I intentionally made the design off center.  You can see where I started it in a previous post.


For the back of the quilt I used two different blue fabrics.  (I think it's cute how the quilt looks with the sun shining through it.)


I used a paisley sort of design for the main part of the quilt.


 In the first border I simply quilted a wavy line of stitching all the way around.  Several trips around the quilt, to be precise!


In the white outer border I used a simple wavy line with balloons on it. . .


. . . till I came to one point and decided to try quilting Hudson's name.


I'm pretty happy with this quilt, and I can't wait to meet the little guy!


Wednesday, May 16, 2012

Class With Alison Schwabe

Today I was in a quilting class taught by Alison Schwabe.  The first of a two-day class.  Alison is from Australia, and our guild was lucky enough to get her to teach for us (and lecture at the meeting on Friday) while she is in the US visiting family.

What a fun class--and great teacher!  This class is totally improvisational.  
Quarter-inch seams?  Don't matter.  
Straight-line cutting?  Don't do it.  
Measuring?  Don't worry about that.

Below are some of Alison's quilts, and close-ups of them, too.  To see more of her work, visit her website here.


Quilt by Alison Schwabe

Close-up of above quilt.

Close-up of top quilt.

Quilt by Alison Schwabe

Close-up of above quilt.

Quilt by Alison Schwabe


Close-up of above quilt.

 Silly me, I forgot to take photos of my experiments and play-time today.  Hopefully, after tomorrow's class I'll have those, plus some actual finished work to show you.  Stay tuned!


Sunday, February 13, 2011

Quilt Retreat

I had the most wonderful time last week. I went on a mini-retreat with four other quilting friends of mine. We stayed at one friend's second house for three nights and boy, did we get a lot of sewing done. We were often up sewing till 11 or 12 at night. It was great fun.

I added a brown binding to this mini-quilt wall hanging (shown previously here). Unfortunately, I didn't have the right fabric to make a label, but I got the binding finished and the sleeve sewn on.


I also worked on piecing together these red strips for another quilt I'm working on. It is from a Kaffe Fassett pattern that I found in a magazine. I was struck by the simplicity of it. The whole thing is 5 1/2" strips, joined at a 60 degree angle to each other. The impetus for this quilt? My stack of red fabrics was getting too high to fit on the shelf!


Here is a photo of our little Bernina sweatshop set up in the kitchen. Four Berninas, plus one in a bedroom! Those machines were sure humming...

And here's a photo of the five of us when we went out to dinner one night. Yum!

I added sashing to some blocks to make a baby quilt...

Here is Gail's quilt, which she had just finished machine quilting. It looks great--little Dora the Explorer fabrics, mixed with frog fabrics.

Joyce finished up this simple sailing ship comfort quilt for our guild.

On the last day, when we were all heading home, Joyce's husband Larry showed up with a bouquet of flowers for each of us. I was blown away.
Aren't they pretty!!!?!

Saturday, February 5, 2011

MOAD/Improvisational Quilting

I was fortunate to take a class last weekend from Ed Johnetta Fowler-Miller. The class was held at MOAD, the Museum of African Diaspora in San Francisco. I found out about the class a little late, and it just dovetailed in nicely with my schedule, and am I ever glad I took it!

This class was in conjunction with a quilt exhibit at MOAD called Textural Rhythms, from African American artists, one of whom was Ed Johnetta.

Ed Johnetta started us off making greeting cards, as a way of loosening us up. She laid out a plethora of paper pieces and told us to just start ripping shapes and glueing them down. Absolutely no planning or arranging was allowed! When we gave her our finished cards of glued scraps, Ed Johnetta put them into framed cards, which made them look like little works of art!

They turned out looking surprisingly good, and it was a very freeing experience.

Then we moved on to our sewing machines. Similar assignment this time, we started with a rectangular base of muslin, and started randomly sewing strips to it. Again we used the "just grab and sew" method, with no planning.

When we finished that, she told us to sew three more of them, then combine all four into a larger piece to use as a wall hanging. Below you can see my result.

We were using all types of fabrics, too, from quilting cottons to decorator fabrics to flannel. Anything goes with this method!

I'm planning to use a blue inner border and an orange-ish outer border/binding, after I get it quilted.

Project Number Three.
Ed Johnetta told us to create a piece of fabric by sewing together some random strips to form a rectangle. When I showed her what I'd sewn, she proceeded to cut it into pieces. Yes, really! Then she said, "Now sew them back together again in a different arrangement." So I did what I was told.
We ended up going through three or four episodes of her cutting up my piece of fabric! And this is the end result.
I love the crazy and impromptu look of it.
With this method of slashing/piecing, the piece ends up with some amazingly small pieces in it. I don't think I could ever have sewn such small pieces normally.
It was a totally liberating and awesome two-day class. Ed Johnetta was amazing, too. She is a great teacher and a lot of fun to be around. If you ever get a chance to take a class from her, jump at it!
Monday, November 2, 2009

Quilting Design Possibility?


Hm-m-m-m...
Could this be a possible quilting design?

*
*
*
*
*
*
*

It is simply a box of tissues!
But I looked and looked at it, trying to follow a line around, and I think it might work. I even tried drawing it out, and I think it's definitely worth an experiment. I'll have to put it in my "idea book." (That's the collection of little scraps of paper that have all sorts of different ideas, drawings, clippings, etc. It's supposed to be all in one place, but....)

Has anyone used this design? Or seen it used? Let me know!


Sunday, November 1, 2009

Quilt Squares All Cut!


I have all of the quilt squares for my latest project cut now!
Next step is to take them to my design wall and try to arrange them in a pleasing manner.
I can't wait to get sewing! But I really can't start till I get them all laid out.

So here they all are, neatly tied up in a bundle, awaiting my next move.
I'm making this quilt just from a photo, so I'm kind of winging it. I wasn't sure how much fabric I would need, so I bought a half-yard of several different fabrics in a fabric group. I figure that I'll sew them all together, and if it's not big enough, I'll add borders.

Friday, October 30, 2009

Start of a New Quilt


Isn't this pretty fabric!?!
I found it at The Grannery quilt shop in Sunnyvale.
(A very nice shop, I might add.)
They are from the 'Panache' by Sanae line from Moda. I don't usually make much mention of fabric lines or designers (except for Harmony, of course!) But I decided to not use any from my stash, and bought all these together.

I'm going to try a quilt that I found done by one of my
"blogger friends," Red Pepper Quilts. (Awesome blog, btw.)
I've started cutting out today, and seeing what a few of the different combinations of colors look like laid out together.

Man, I love starting a new quilt!
Now, if only I were as enthusiastic about finishing a quilt...

Saturday, April 25, 2009

Baby Quilt Tutorial (Part 1)


Here is a photo of a baby quilt that I just finished.  It's nothing incredibly original, but I'm going to show/tell you how I made it.


I started out with many, many 5" squares.  I don't know how many--I didn't even count them.  I tried to choose a light and a dark value of each color I used, e.g. a light blue and a dark blue together.  


I placed a dark blue and a light blue square right sides together.  Using my Fons & Porter quarter inch seam marker and a marking pencil, I drew a line 1/4" on either side of the imaginary diagonal line.  These lines became my sewing lines.


I sewed on the marked sewing lines:  two seams on each set of squares.  Note:  if you are not familiar with chain-piecing, look that up on your favorite quilting site or in a book.  It worked really well on this project.


Using a rotary cutter, I cut each "square pair" in half on the diagonal.


Open each "square pair and.....


.....iron the seam to one side.