Friday, January 31, 2014

New Members of the Family!

MisterStitches and I have two new additions to our family!  In December we adopted these two squirmy little black kittens from our local humane society.  

I'm trying to hold these two wiggly kittens, but they won't cooperate with the camera!


Their names are Cassie (on the left) and Percy.  Short for Cassandra and Persius.


They are extremely playful and energetic, which means the house needed to be baby proofed.   It's been almost two years since our last cat died, and she was older and more tame.  These guys can't be trusted anywhere!  They are only allowed in my studio under my supervision, and then are sometimes tossed outside the door!

Since they arrived in December, we had only about three Christmas decorations put up that could be called kitten-proof.  The photo below shows a really simple decoration I like to put in the tall narrow windows by our door.  I used dental floss and little round white stickers from the office supply store to make these "snowflakes" falling down the windows.  Well, those falling snowflakes were just too tempting, so the bottom parts had to be cut off and they only "fell" down the upper half of the windows!


Sunday, January 26, 2014

Crochet Factory

I've not been getting much quilting work done lately, but I've been doing a lot of hand sewing and crocheting.  I've completed several more baby afghans, and I'll show them to you here.


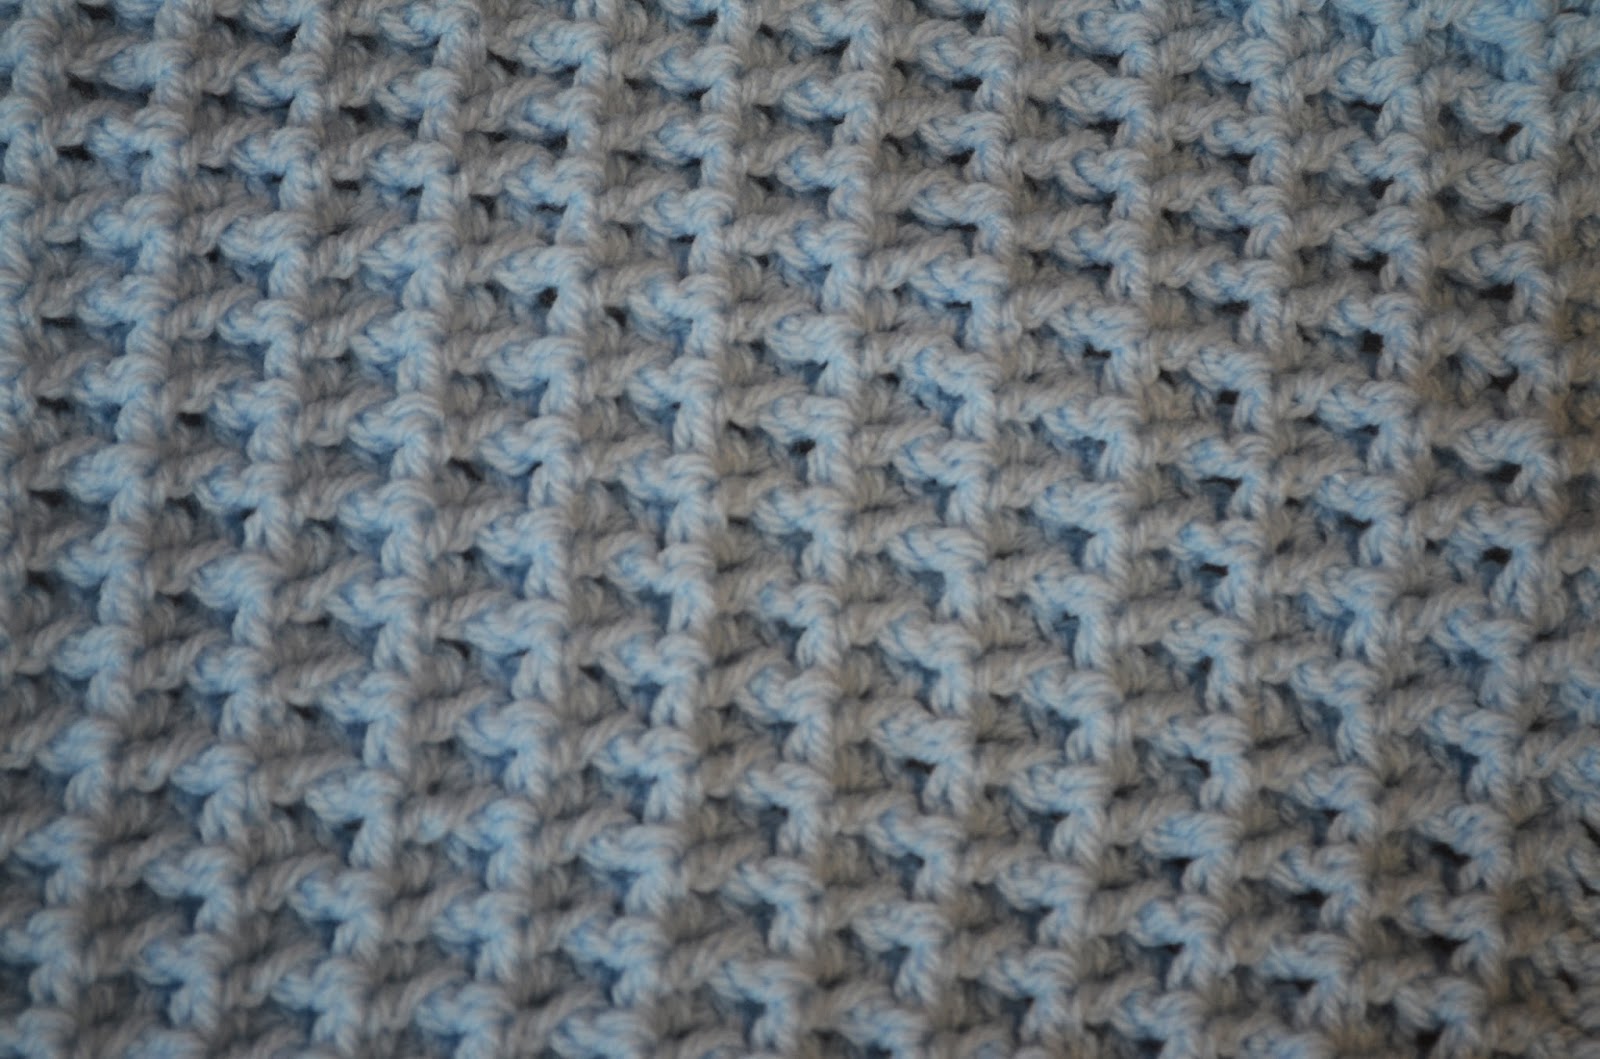
This light blue afghan is made of real heavy, thick yarn.  It's so soft and cuddly; it almost feels like minky fabric after it's crocheted.


The photo below shows how thick the yarn is.  I simply did rows and rows of double crochet for this afghan.


Another afghan made with the thick, cuddly yarn is this multi-colored one.


For the next afghan I actually followed a pattern, instead of making up one of my own!  The pattern was on the inside of one of the yarn skeins.  It is basically a big modified granny square that keeps growing and growing! 


 I went back and forth between a light yellow yarn, and a variegated orange-y yarn.


I made this afghan by double crocheting around the post of the previous row.


I really like the sort of basket-weave effect this stitch gives.


I used the same peach-y variegated yarn as in a previous afghan to make this one.  


 It is simply single crochet back and forth, with a couple rows of treble crochet thrown in occasionally for variety.


This next one isn't the best shot, but it's another orange-y peach-y variegated yarn, with a yellow scalloped border around the edges.


I basically do these because they are fun to do, keep me occupied when riding in a car or watching tv, and are an excellent take-along project.  Very portable.  That's why I tend to keep the patterns ultra simple, so I don't have to concentrate too hard, or read directions while I'm doing it.  So far I've been giving some away, selling a few to friends (for the cost of the yarn!), and sticking the rest in a cedar chest.  When I get too many I'll find a charity that would like to have them.

Saturday, January 4, 2014

Embroidered Christmas Ornaments

I have been quite busy the last couple months sewing Christmas ornaments.  The pattern I used is by Sara Hardwig for Blueberry Backroads, and I found it at Bear Patch Quilting Company in White Bear Lake, Minnesota.

There, now I have all the legal business behind me!


Here you can see photos of several of the many that I made.  Silly me!  I didn't take a photo with anything to show you the scale.  They finished at 2 3/4 inches by 3 1/4 inches.


These tiny ornaments don't take very much time to finish up.  I ended up making 25 of them for my guild to sell at our annual Festival of the Trees, which is our major fundraiser.


When I was done with all of them, I started in on some more to put in with Christmas cards to give to some of my family.  It was suggested to me that they could also be used for gift tags.  Easily done by writing the name on the back with a fine point indelible marker.  Then the recipient also has a nice ornament, too!


I set up a sort of assembly line to make the embroidery bases.  I first cut out 1 1/4 in strips from various green and red fabrics.  Then I cut out the small muslin rectangles (2 by 2 1/2" pieces).  I randomly chose a red and a green fabric to sew around the muslin.  Next came cutting up the batting scraps to put behind the "frames."  And finally, I cut pieces for the backing for each one.  


I used my "light box" (paper and fabric taped to a window) to trace all the patterns with my Frixion pen.  Then I proceeded to stitch away.  I embroidered quite a few, maybe a dozen, then sewed them to the backing fabric (adding the gold braid for a hanger), turned them right side out, and stitched closed the opening.  All that was left to do then was sew the simple little quilting line around each "frame."

I encourage you to go to Blueberry Backroads and look at their selection of nice patterns.  Or shop for them at your local quilt shop, which is what we all really like to do.  I know that I want to try some more of her patterns in the future!

Friday, December 20, 2013

A Quilt by GranddaughterStitches

While GranddaughterStitches was here for Thanksgiving, she told me that she wanted to do some more sewing.  She had seen one of my smaller scrap piles!


She picked out some fabrics that she liked, and said that this time she wanted to sew them side-by-side together, instead of one on top of the other, as we did the last time we sewed together.  Above you can see the finished product of her work.  She chose four small squares that she wanted to sew in a "patt-er-un" and a fifth piece to sew onto the top of them.  GranddaughterStitches particularly liked the piece of fabric with the numbered circles on the edge, so we made sure that edge showed.


I explained how we would sew two pieces together, then two more pieces together, then sew them together and finally sew on the longer piece.  GranddaughterStitches called the pincushion a "pin pillow."  I think that's a pretty good name, especially for the pin pillow (shown above) that SisterStitches made for me.


Here you can see GranddaughterStitches concentrating very hard on her stitching.  There was a little bit of the perfectionist at work in her, so she got a little frustrated with some of the sewing.  But we made it all work out in the end.


And GranddaughterStitches is very pleased with her final result.  Which she gave to her mother.  She was suitably proud of her work. 

That evening, when she went to bed, GranddaughterStitches told her mom that she when she grows up she wants to  be a teacher (like her mom), a gymnast (like one of her aunts), and also a quilter.  That really  made my day!

I think we may start to work on the machine soon.  We'll see. . .

Tuesday, December 10, 2013

More Crocheting


Here is another baby afghan I just finished crocheting.  They go so fast that I'm afraid I've probably forgotten to show you a few!


This one was destined to go home with DaughterStitches after Thanksgiving.  She's going to give it to a friend who is having a baby.


The thing that is a little different about this afghan is that it is very heavy yarn.  (I ordered it on-line and was surprised when I opened the box.  Had no idea the yarn was like this!)  It is called "Baby Blanket" by Bernat and is actually quite soft and cuddly.


Here is a close-up of the afghan.  Since the yarn is so fluffy, it really fills in and feels almost like minky fabric when it is crocheted.  I like the yarn.  It is a little harder to crochet, though, as it's a heavier yarn to pull with the hook.


GranddaughterStitches was on hand, so I had her model the afghan for me.  It's a big-size baby afghan.


Another close-up of the yarn next to a regular pen.  See how big and thick it is!  It all makes for a nice comfy afghan.


Saturday, November 30, 2013

Scrap Block Quilt Number Two

Way back here I showed you a quilt that I made from some fabric squares I had been given.  And I sewed it up really fast.  There were still squares left from that project, so I thought I'd better make another quilt.

And here it is!


(I was having some trouble with the wind outside, making it a little bit difficult to photograph this quilt!)
It turned out to be exactly 10 squares by 10 squares.  I had no idea there was such a perfect number of squares left, as I had never counted them.


I decided to make Quilt Number Two a little bit bigger, so I added on a green inner border and a larger, outer border from purple grape fabric.  (A friend of mine said she thought the grape fabric would make it sell well.  I can only hope!)  BTW, I'm not receiving any money for this quilt; the money will go to my guild and Gualala Arts Center.


Here is the pieced back I made for the quilt, using some more of that same grape fabric, and a little bit of a light blue print, from my friend Harmony of Harmony Arts.  The rest of it was a light green.


 I tried out a few free motion quilting motifs when it came to quilting this quilt.  Above you can see some swirly designs.  I took a lot of photos of the quilting, but none of the designs showed up very well against the very randomly-colored quilt top.


So I took some photos of the back of the quilt.  Please be kind, as I consider myself a 
"constantly improving free motion quilter."  That is my optimism speaking!


In the first, smaller border I did a little vine-y or leafy pattern.  I kind of liked doing it.  Gave me some good practice with travel stitching.


In the larger border I quilted these over-lapping circles.  My inspiration for this was that SisterStitches used this design on a quilt that she quilted for me.  This design was actually easier than I thought it would be, and a lot of fun to do.  I'll definitely be using this design again!


I used some more of my scrappy, leftover binding pieces to finish it off.  Sometimes quilts are just so darn easy to make, aren't they!?!

Tuesday, November 12, 2013

A Butterfly Shirt for GranddaughterStitches

We were excited to go visit GranddaughterStitches (and her parents) over Halloween.  It was fun to spend Halloween in her kindergarten classroom with her, seeing all the kids in their cute costumes, and to witness the excitement in the whole school.  It was also great to be able to assist in DaughterStitches's 2nd grade classroom.  The whole school was decked out in costumes!

Anticipating our visit there, I embroidered a little pink t-shirt for GranddaughterStitches.  I found a pattern on the internet (can't recall where I found it) for a redwork butterfly embroidery.  So I used that pattern, but added my own colors to the butterfly.


Here is a close-up of the butterfly.  I used blue, light green, and light blue for the colors.  Everything was sewn with backstitch except for the dots, for which I used satin stitch.  I backed the embroidery area with a nice soft fusible web to stabilize the embroidery.

It actually went quite fast, and I soon finished the embroidery.  Then I thought, "That was too easy.  I need to do something more."  


So I moved on to the bottom of the t-shirt and proceeded to make little embroidered flower and leaf motifs.  I added some colors to my palette for the flowers!


And here is GranddaughterStitches wearing her new pink butterfly shirt.  
I think it suits her just fine.