Showing posts with label scraps. Show all posts

Monday, February 24, 2020

Putting Batting Scraps To Use

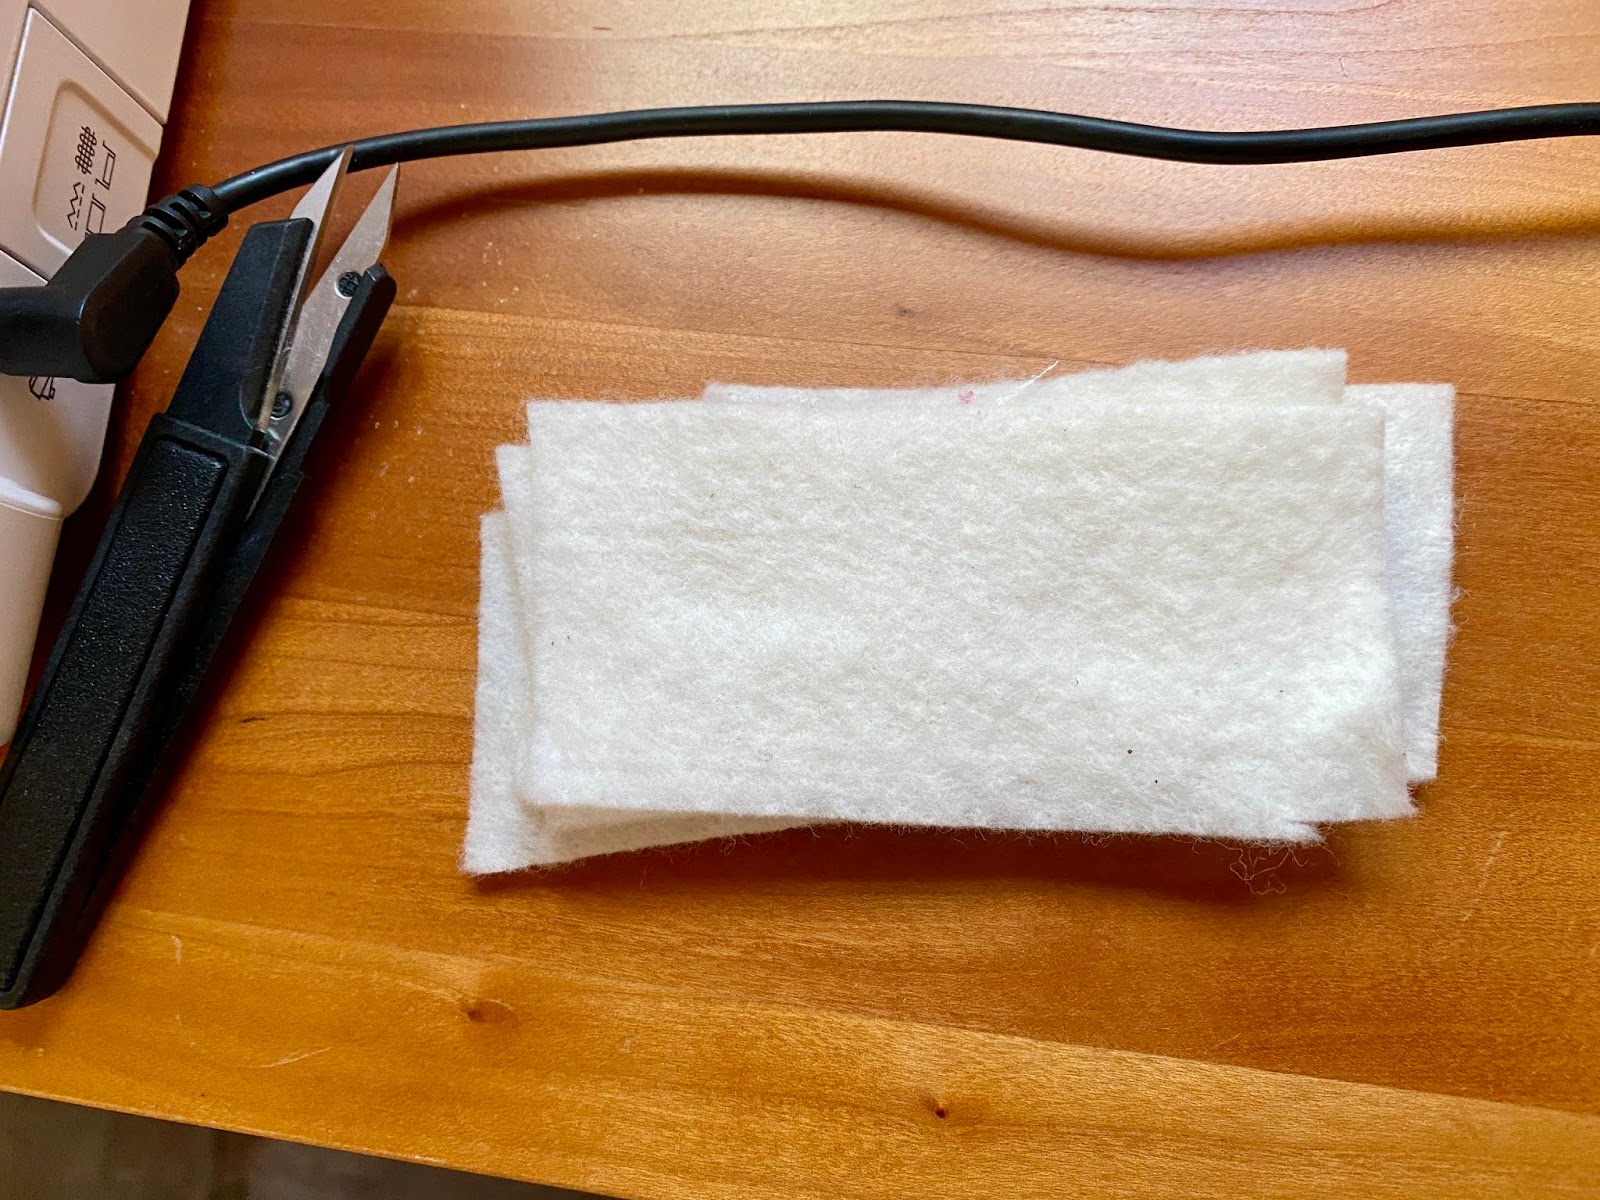
 I've found a way to use my leftover batting scraps.  Or should I say, "another use."  I like to use them for little thread catchers beside my sewing machine.  The ones pictured here measure about 1 1/2" by about 3 1/2."  "About" is the operative word, as they are definitely cut free-hand.  They could even be bigger than this.


After they get filled up with lots of thread scraps, I just lift off the top piece, fold it in half and throw it in my bin of dog bed filling.  The thread seems to really stick to them!


At another sewing machine I have some cut into circles, as they fit that space better. 

Friday, July 26, 2019

A Teacup Pincushion

I was given a pretty little teacup by my friend, Sandy.  What to do with it. . .  What to do with it. . .
Then it hit me--a pincushion!

I chose some fabric from my scraps.  I wanted to match the pretty greenish-tealish color on the teacup but I didn't have that color in my scraps. So I went with one that I thought looked slightly old-fashioned.


I squished up some polyester fiberfill and stuffed it in the cup.  Then I added more and more, always squishing it down.  I kind of wrapped my fabric piece around the wad of fiberfill, and placed it in the cup.  My hot glue gun was all ready to go!

But it didn't seem to work very well.  So I hopped on over to Pinterest and searched for teacup pincushions, as I knew someone else had done this before!  And yes, thank you, Thoughts and Thimbles, for the tutorial.  Shannon (at Thoughts and Thimbles) told me to run a gathering stitch around the outside of my circle (of course--why didn't I think of that!?!), then stuff it full of fiberfill and draw the threads up to close it.  Oh, and my fabric circle was too small (just a little bit) so I cut another one.  Much better this time.  Shannon also told me how to add a button.  I probably wouldn't have thought of that, either!

I ran a bead of hot glue around the inside of the teacup rim, then placed my wadded up fabric "ball" inside.


Et voila!!  My pretty little teacup pincushion.


Sunday, September 16, 2018

Two-Inch Squares

I was reading recently about Bonnie Hunter.  Many of you will know of her as she is a wonderful quilter and teacher, with several books to her name.  I've never taken a class from her, or met her, but I read about an idea she uses.  Bonnie doesn't use a thread catcher (thread spider, leaders and enders, whatever you call them) at the beginning and ending of her seams when sewing patchwork.  Instead, she has a stack of small squares beside her sewing machine.  She pairs together two small squares, and sews them as her beginning piece and ending piece.  Does this make sense?  Then she is left with lots of little two-square pieces, the beginnings of a scrappy quilt.

Here is just one of her many books about quilting with scraps.


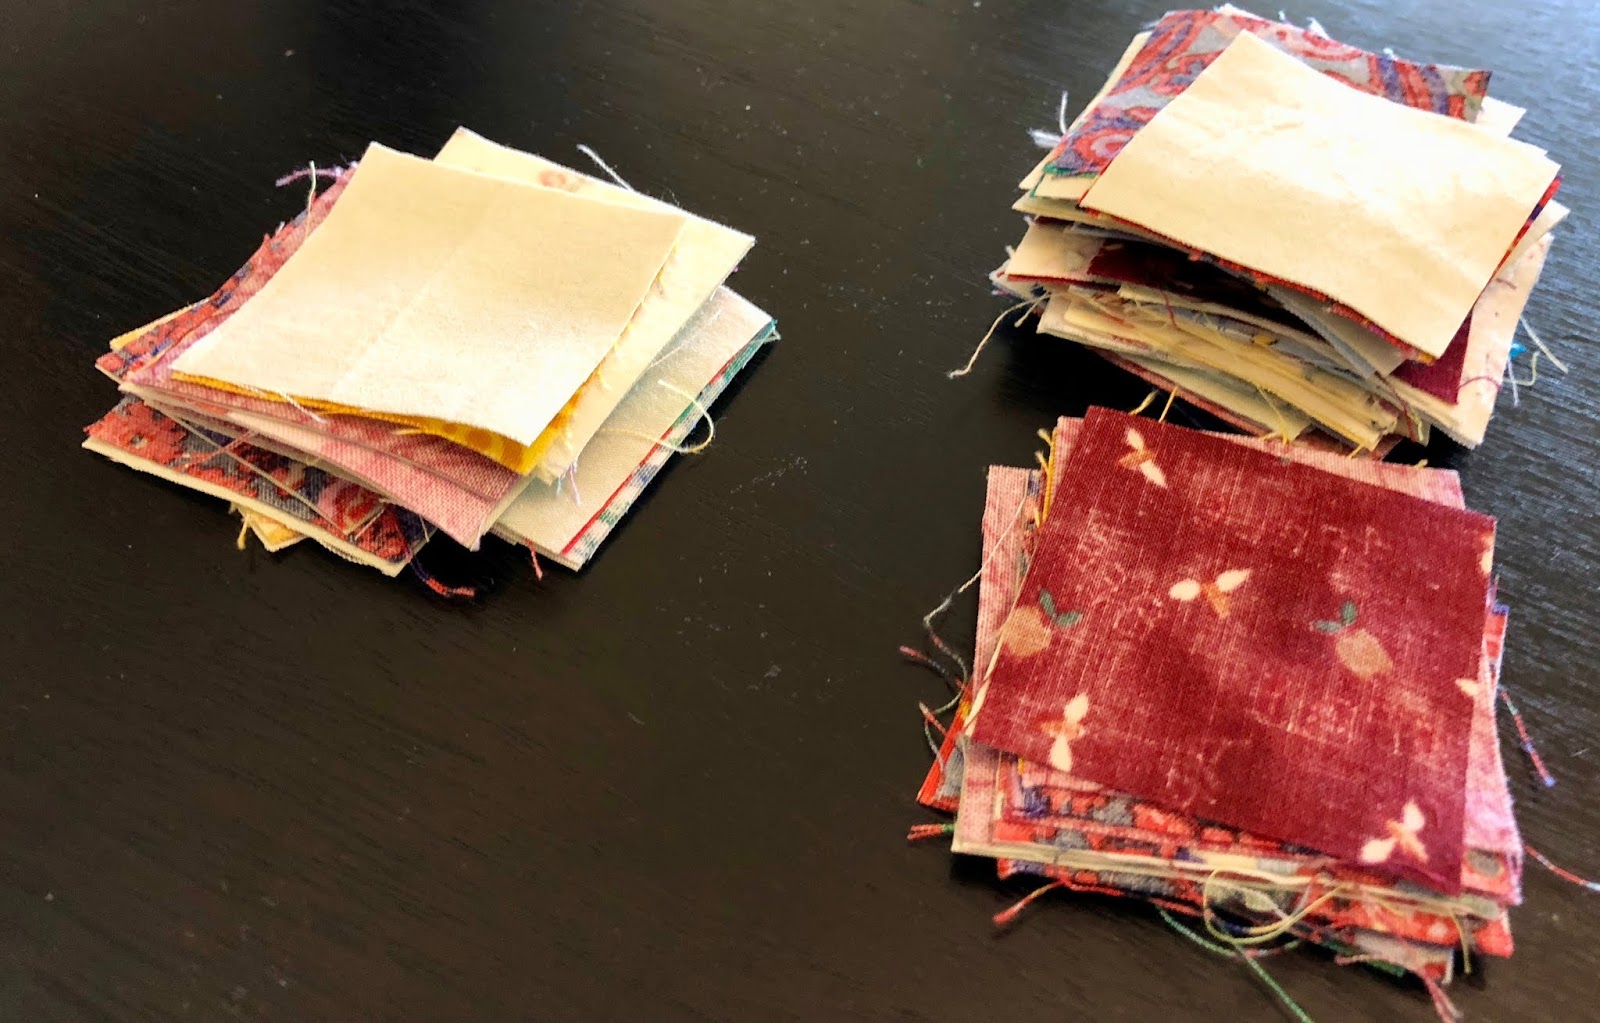
So I have been cutting some of my scraps into two-inch squares.  When I'm watching tv, or doing something else, I pair two different squares and face them right sides together so they are all ready to use.  I have a small drawer divider tray where they can sit nicely next to my sewing machine, within easy reach.  The already stitched two-patches get placed in the bigger part of the divider tray. 


I actually found some pieced scraps that had been trimmed off something else and I cut a few 2" squares that already consisted of two different fabrics.


This wire drawer divider was holding a few safety pins, and not really being used, so it now sits  beside my sewing machine.  The two lower stacks are single 2-inch blocks, and the sewn-together ones get put in the upper section of the divider.


I'm not sure how many of these little two-patches I need, but I'll keep gathering them and I'll store them in a bin to go together some day into a larger quilt.  Check back on this blog in ten years or so to see if I've finished the quilt top!!

Friday, June 23, 2017

Are We Crazy, Or Not?

People often say that we quilters are crazy because we buy fabric, then cut it into pieces, and sew the pieces back together again.  Well, maybe I am crazier than usual, because in this case I cut up the fabric, sewed the pieces together, and then I cut up those pieces yet again!

A long time ago, I started working on a hand sewing project. Can't believe it was two years ago!  (2015--check it out here!)

I appliquéd approximately one gazillion (I counted!) circles onto squares of fabric.  Many different fabrics and four different sizes.


Then I needed to cut most of the squares into quarters.  After that I rearranged them all and sewed them back into squares.  On some of the large squares I sewed a small square on as one of the quarters.  (As shown below)  Did that make sense?!? 


This is a great big stack of 130 squares.


It was fun rearranging the squares to sew them together.  I dumped the pieces in a large tote bag, stirred them up, and then just reached in and grabbed one!

Interior of bag.
More interior of bag.


 I pressed the seams so they nested very nicely together when I sewed the second seam.


Now all of the squares have been reassembled, and are ready to be sewn together.  But I'm thinking that it might be a good idea to square up all of the blocks so they will go together easier.

The pattern has a specific layout.  I plan to follow that arrangement guideline when putting the squares up on my design wall.  But then I will step back and study the arrangement to make sure I don't have too many of one color all grouped together.

I'm not at my design wall right now, but I wanted to see what it will look like.  So I laid out a six-by-six grid on the bed.  And I'm pleased!  I really like how colorful and scrappy it is.  Exactly what I wanted!

As you can see, some of the squares are left with one whole circle appliquéd down, not cut into quarters.
Wednesday, July 15, 2015

Tidying Up My Scraps

I think most of us have scrap bins that look something like this, right?  A big jumble of scraps all jammed together.  At least I have managed to separate mine into different bins for different colors.  (These plastic shoeboxes fit on my shelves real well!)


In this bin I keep my blue and black scraps.  Not very tidy, and it always requires searching through everything in the bin to find just the right fabric.


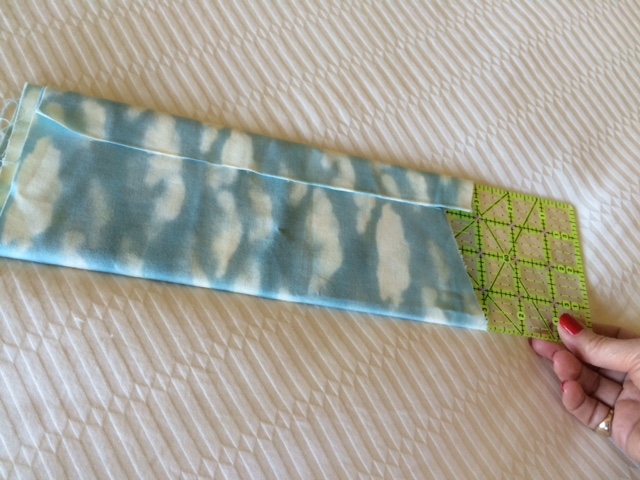
At one of our guild meetings a woman demonstrated how she used her four-inch ruler to tidy her scraps.  You've probably heard of this before--the fabric is laid out flat, then "rolled" onto the ruler.  The ruler is then pulled out and the resulting fabric folded in two (or three) for a nice neat bundle of scraps.  (Thanks, Judy!)


Fabric is rolled onto a ruler, then the ruler is carefully pulled out.

The fabric then is simply folded in half.

Or it can be folded into thirds if the fabric is too long,
depending upon the size of your storage container or drawer.

This way I can see all of the fabrics at once, so no more pawing through the bin of scraps.  The smaller scraps that I still wanted to keep but were too small to roll, I've just folded and put on the side  next to the neatly folded fabrics.  

And did I mention that this was a very easy, while-watching-television project!?!  Now it is a joy to take down one of these scrap bins to look for a fabric!

Tuesday, July 7, 2015

New Beds for the Cats

Percy and Cassie now have brand new beds during which they can spend about 75% of their day!  I had made some dog and cat beds earlier for the local Humane Society, so I guess I could do the same for my cats.


The cats really needed new beds.  I couldn't find ones that I liked in the stores, so I decided to make some.  I found some tutorials on Pinterest, and read a few different methods before deciding what I wanted to do.  I wanted to use wool fabric, because I know the cats really like that.  


So I used some wool that I found in my stash.  This plaid cashmere is leftover from a cape that I made myself quite a few years ago.  There was a nice bit of it left.  So I used it to make one cushion.  That was easy.


Unfortunately, I forgot to take progress photos, so I'll describe the next part.  I made a long tube out of some more leftover wool (most of which is wool I "found" and felted as an experiment).  All of the stuffing was fabric scraps.  I had saved up a good amount of those!  I stuffed the long tubes and sewed the ends together.  Then I hand-sewed the big loop-tubes onto the cushions.  That was a little bit of some hard work, as I had to pull the two pieces together and hand-sew at some awkward angles!  Not my best work, but I'm sure the cats don't mind!


Above is Percy in one of the beds.


And this is Cassie, in a red plaid felted bed with a green plaid on the bottom that doesn't even come close to coordinating!


And I'm still left with some scraps!  Why is it that scraps can never be completely gotten rid of!?!


Friday, December 20, 2013

A Quilt by GranddaughterStitches

While GranddaughterStitches was here for Thanksgiving, she told me that she wanted to do some more sewing.  She had seen one of my smaller scrap piles!


She picked out some fabrics that she liked, and said that this time she wanted to sew them side-by-side together, instead of one on top of the other, as we did the last time we sewed together.  Above you can see the finished product of her work.  She chose four small squares that she wanted to sew in a "patt-er-un" and a fifth piece to sew onto the top of them.  GranddaughterStitches particularly liked the piece of fabric with the numbered circles on the edge, so we made sure that edge showed.


I explained how we would sew two pieces together, then two more pieces together, then sew them together and finally sew on the longer piece.  GranddaughterStitches called the pincushion a "pin pillow."  I think that's a pretty good name, especially for the pin pillow (shown above) that SisterStitches made for me.


Here you can see GranddaughterStitches concentrating very hard on her stitching.  There was a little bit of the perfectionist at work in her, so she got a little frustrated with some of the sewing.  But we made it all work out in the end.


And GranddaughterStitches is very pleased with her final result.  Which she gave to her mother.  She was suitably proud of her work. 

That evening, when she went to bed, GranddaughterStitches told her mom that she when she grows up she wants to  be a teacher (like her mom), a gymnast (like one of her aunts), and also a quilter.  That really  made my day!

I think we may start to work on the machine soon.  We'll see. . .

Wednesday, December 28, 2011

Very Scrappy Quilt

Sometimes people criticize quilters for cutting large pieces of fabric into smaller pieces, then sewing those small pieces into a larger piece to make a quilt. We quilters all know that's just plain nonsense! But I have a project that used already small pieces of fabric scraps to make a quilt. The idea came from Elizabeth at www.ohfransson.com. She made a large floor pillow with this technique; I made a small-ish quilt. It can really be made in any size you wish.

Here is a photo of the finished quilt top.


Now I will show you how I got there!


I used my blue scraps for this quilt. I didn't sort them at all, or care if the blues went together or not. The above photo shows my little fabric bowl full of blue scraps sitting next to my sewing machine. Next to the fabric scraps is a pile of one-inch strips of off-white fabric. This fabric is leftovers from a sheet that I had re-purposed into a comforter cover.


This photo shows my first two pieces of blue fabric with a strip of off-white between them. This is the basic step for the whole project.


I sewed the 1" strip to one piece of blue, then pressed toward the blue. The 1" strips were all approximately 20" long, so they simply got trimmed down to the size I needed when I sewed them to the blue pieces.


Here is the first set of fabric sewn together and pressed.


Next I laid them on the cutting mat and trimmed one side to a straight edge. As you can see, I angled my cut, which adds to the fun and scrappiness of this quilt.

Now we're missing a couple photos, but the next step was to sew a 1" strip to my straight edge. Then I made another set of two (or maybe three) fabrics, made a straight edge, and sewed it to the first set I'd sewn. Get it?


And here is a finished block. You may notice that the block itself is not square either, but has a slanted edge on the bottom. That's ok! It will all work out in the end! Also, I have no idea exactly how big this square is. I just kept sewing fabric pieces until it looked about right. Really, this project is so forgiving! Which also makes it very liberating. Just grab a piece of fabric and sew it to the next one! It's so much fun.


Here's a close-up of one of the blocks. I particularly liked this fairy fabric. I remember it from quite a few projects ago!


And here's another shot of the finished quilt top. Now I just need to add borders and finish it up. If you look closely, you can see that the blocks and rows are not square and do not line up exactly. I used the same one-inch strips to join three blocks together into a row, then evened up the bottom and top edges. Another one-inch strip joined the rows into a whole quilt top. You may notice that the rows and columns are not parallel or even with each other. But it doesn't matter: it all gets trimmed square in the end.

Saturday, November 7, 2009

Very Scrappy Quilt

I'm really getting there with this scrappy quilt!
I referred to it way back in September in this post. I got the idea from the blog by crazymomquilts.blogspot.com. I was so excited to try this idea, but I still have a lot of fabric scraps left!

I did it a little bit differently than crazy mom did, but not much. I sandwiched the quilt top, batting, and backing, then basted it by pinning on the patches. That anchored everything quite well. I started to use my walking foot to sew around the edges of the squares, but that was way too much turning of the quilt around in my machine. The quilt measures somewhere around 40-something inches by 60 inches. That's a lot to push and pull through the machine for 2" or 3" lengths of stitching.

So I switched to the free motion foot,
and just did my best at getting fairly straight lines around the squares. I have to admit that I didn't worry about it too much. And they are not all sewn on perfectly, but that's ok.

If I did it again, I might make some loopy-loops between the squares, so I wouldn't have all those starts and stops to make. But what the heck! I spent some nice quiet time snipping all the threads and taking out a few remaining safety pins. I went outside and sat in the unusually warm sun to snip the thread ends, with just a light breeze, and the ocean waves crashing in front of me.

I have the binding chosen and pressed, so hopefully tomorrow I'll get this baby finished and I can show you the finished product. {Way to put the pressure on, MissesStitches!} Just had a little interruption this afternoon when the power went off for a bit. There wasn't a storm, so I'm not sure why, but my lights got dim, and my sewing machine and iron were idle for a short while.