Showing posts with label Challenge quilt. Show all posts

Monday, May 24, 2021

The Blue Quilt (for lack of a better name!)

This is a quilt that I've been hand appliquéing for quite a while.  The top is all finished.  I added one star into it, because the theme of our guild's challenge title (the challenge show that was supposed to be spring of 2020, but which has been postponed indefinitely--maybe next year) was A Star Is Born. Any quilt qualifies for the challenge, as long as it has a pieced (not appliquéd) star somewhere in the quilt.

I was using this hand appliquéing as a traveling project, something to take along with me when I'm on the move.


After I got the squares put together, I saw a friend's quilt which I really loved.  She had put a narrow white border around the quilt, with a wider pieced border around that.

So I went to my strips box.  It was handy because of the strippy star quilt that I made recently.  I pulled out all the blue fabrics.  I cut some muslin rectangles, 6" wide by about two feet long or so.  On to that muslin I sewed strip after strip after strip.


This shows my little iron (beside my sewing machine) where I'm stitching the strips to the muslin.  Grab a blue strip, sew RST to the last strip, iron, return to machine, repeat.


This is how the quilt top looks now on my design wall.  All the borders have not been  sewn together yet.


This photo shows only the top portion of the quilt.  This is not the whole quilt top

But what name to give this quilt?  I really have no ideas. "Scrappy Elipses"?  Doesn't quite roll off one's tongue.  I'm really at a loss.  I would certainly appreciate any suggestions for a name.


Friday, December 14, 2018

The Final Journey--A Quilt

The theme for our guild's challenge this year was "Journey."  My immediate thought was "the final journey," or death.  (I'm not always so macabre, I promise!!)  And what better way to show that, I thought, than "the light at the end of the tunnel."  So I googled that phrase and found these two representations, which I thought were perfect.


And I knew just what method I wanted to use to show my idea.  I learned this method back in 2015 in an Empty Spools class at Asilomar.  And I blogged about the quilt I made back then here.

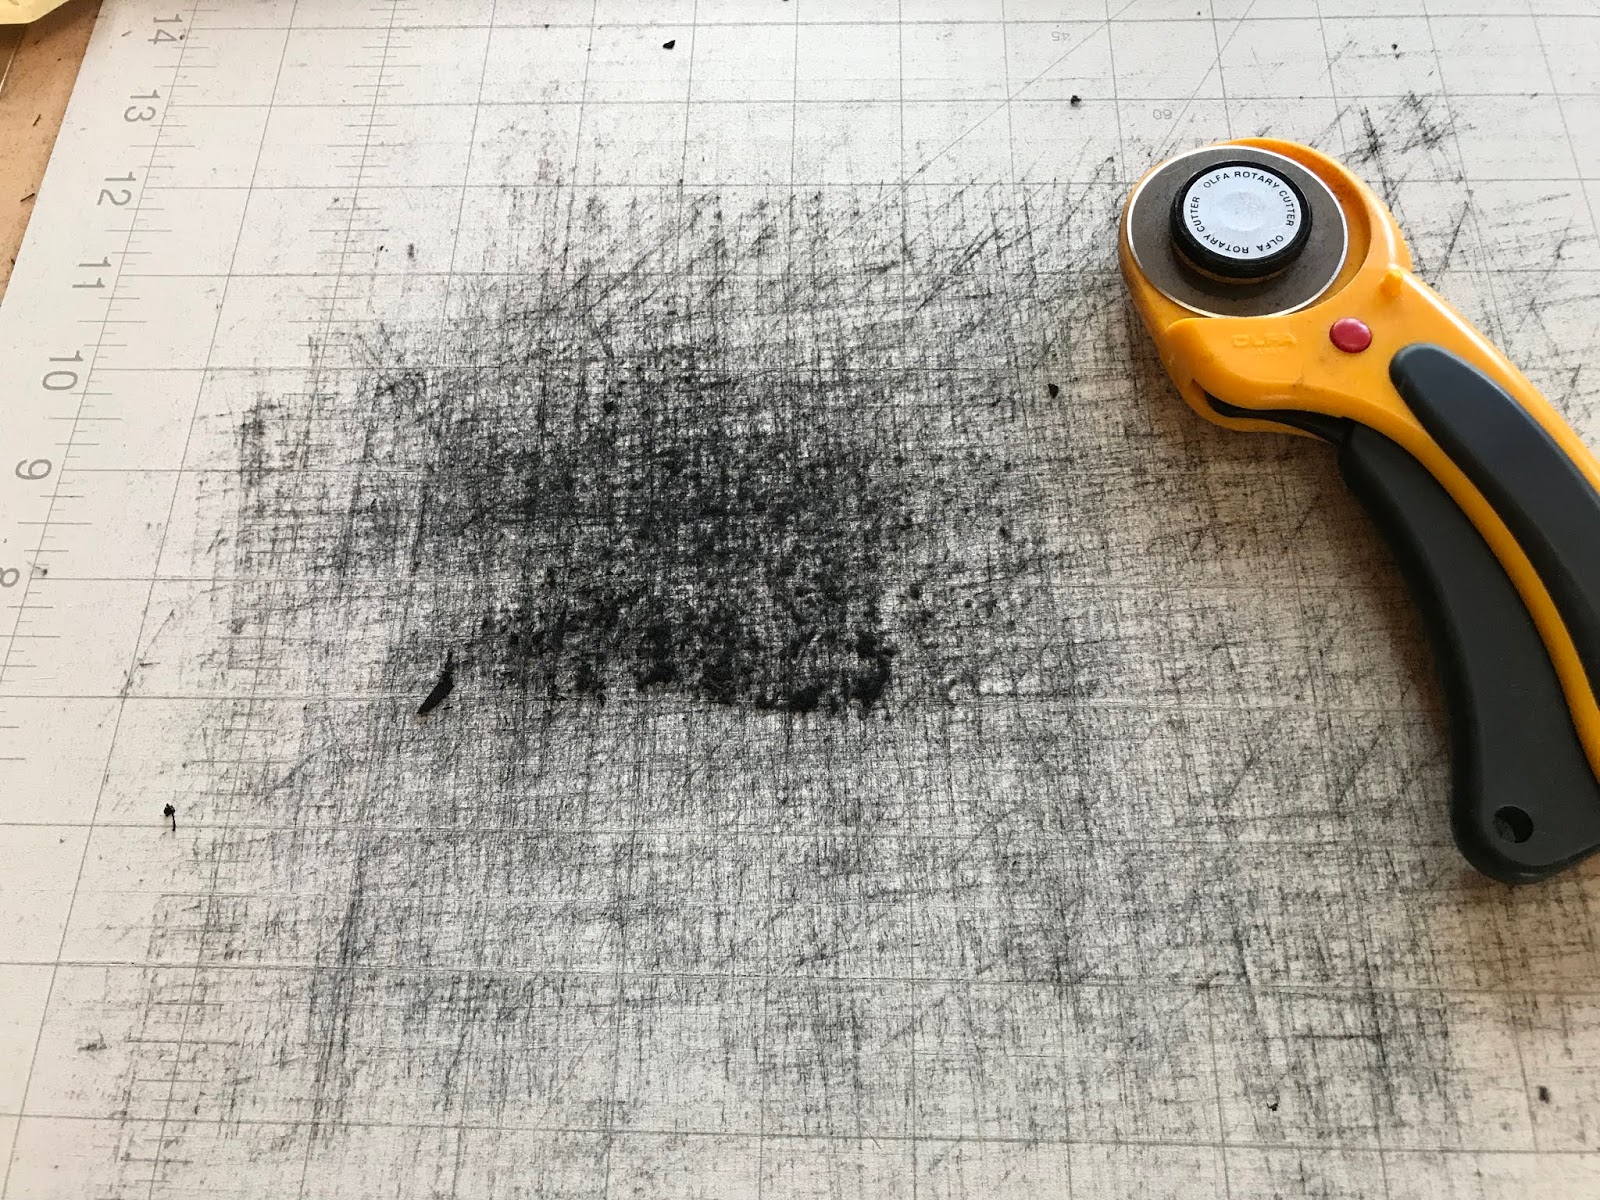
 So I started cutting fabric confetti.  This is a very simple process.  Simply lay a piece of fabric down on the cutting mat, then cut random up and down strokes with the rotary cutter.  After that, cut random horizontal strokes.  You end up with confetti!


Maybe it wasn't a wise choice to cut the black fabric on a white cutting mat.  Uh-oh!


The plastic bags are kind of shiny and distorting, 
 but this shows some of the different colors of fabric that I cut into confetti.  I must add that with a lot of these, I had to get out more fabric and cut more confetti, as I ran out when I was building the design.


Finally I'm starting on the design!  Using the photo as a suggestion, I started laying down different colors of confetti fabric.  I started with the lightest colors and worked my way out to the edge.  (I have my backing fabric taped to the table, wrong side up, and then that is just batting laid over it.)  The confetti pieces stick pretty well to the batting.  Although I would not do this in front of an open window on a windy day!

You can see that m&ms are sometimes required when doing this!

Here is a close-up of some of the lighter pieces.


And this is what your floor looks like--even on a good day!!


Here I've made quite a bit of progress.  I just kept adding more fabric bits in a circular design.


You can see how the color gradation is changing as I get to the darker colors.  I wanted the light center to be off-centered on my quilt.


I pretty much have the whole piece filled with fabric bits in this photo.  Now comes the fun part!


A piece of black tulle gets laid--Very Carefully--on top of the whole thing.  Pretty sure MisterStitches helped me with this part.  Because once you lay the tulle down, you really don't want to re-position it.


And then came the fun part of safety pinning the living daylights out of it!  The pins have to be placed very close together so that the fabric pieces don't shift.  And yet, you can see that the fabric has shifted some; the white batting is showing through.  That will get taken care of with the quilting.

I know I used every safety pin in my house, and then borrowed some from a friend for this!


This photo shows the quilting.  While I'm quilting, I need to stop every so often and use a long pin to reposition some of the fabric pieces that have migrated.  This is the part where it gets quilted oh-so-heavily, to hold down all the little pieces.


When the quilting was all done, I hung it back up on the wall.  Wow, it really looks different from this angle!  Instead of laying on a table top!  


But now you can see a problem I had.  That white batting really looks awful.  At this point, I thought that maybe I should have used black batting, but that would have shown through the lighter fabrics, probably.  Not sure.  Maybe I should have used white batting for the inside circle and then black batting to fill in the outside edges.  That might have worked.  

What I did here was to take a sharpie and color in all the side parts of the batting.  
This. Was. Not. A. Fun. Job.


Another part of this challenge was that we had to use at least a five-inch square of a particular blue fabric.  I pondered how I was going to achieve this!  But then I simply cut the five-inch square into confetti.  I spread the little pieces around in the outer black part of the quilt.  And it worked!  In fact, I really like the effect. 


Here is a close-up of the little blue specks.


The final product.  About 36" by about 36".


I should maybe add a p.s. here at the end.  In May of 2017 I fell and broke my left arm.  That really hampers sewing and quilting!  I already knew this because I had broken my left arm in 2007 also!  But this type of "quilting" was very easy to do with just one (dominant) hand.  All the cutting of the confetti used just my right hand.  I started placing the confetti on the batting with just one hand.  Then I needed two hands for basting and quilting, and my arm had healed by then!

Thursday, September 27, 2018

Progress. . .

I've been making progress on one of my three quilts for our guild's challenge show.  That's really a good thing, because they need to be turned in next week!


Here is a cloud in my blue patchwork sky.  I machine felted regular batting onto a sheer white fabric. Then I tacked the fabric onto the quilt.  That saved me from the uncertainty of how the felting action would affect the background, if at all.


And this is a shrub.  A real close close-up of a shrub.  I started by laying down some random fibers that I had collected from my dryer's lint trap after washing new fabric.  Then I embroidered feather stitches over the top in a very random way.  I repeated the embroidery with different colors.


And I'm quite proud of this!  It is a  brick sidewalk, and I think it turned out pretty well, for someone who isn't an expert in free motion quilting!  I checked Pinterest for "free motion quilting bricks" and whose name should come up but Lori Kennedy!  She's a queen in my eyes, of free motion quilting.  I followed her great directions for bricks, did a practice piece, then went to work on my little sidewalk. I used a chalk marker to make the parallel (and in some cases slanted) lines, to keep my bricks fairly even.


This is maybe more detail (and quite different lighting!) than is really needed, but I thought I'd include some more photos of the bricks.


After the challenge show opens next week, I'll show you the finished photo of this quilt, and my other two quilts, too.

Thursday, September 13, 2018

Sashiko Design for the Quilt Guild Challenge

Several years ago I started a sashiko embroidery piece in a class with Sylvia Pippen.  Like a lot of my sewing, it got put away half-finished to be discovered at a far distant time.

I came across it and decided to finish it, as there wasn't very much more to do on it.  And as I was working on it, I realized that the pretty blue mottled fabric (in the center below) was very similar in color to our guild's challenge fabric for this year (the outer fabric below).

 I decided to frame it with the challenge fabric and finish up the wall hanging.  Dear Daughter-in-law-Stitches was visiting us, and since she has such a good artistic eye, I got her input on my borders.  We agreed that a thin white border and slightly bigger black border would work well inside the blue fabric.  The white brings out the white stitches, and the black helps "tame down" the brightness a bit.

This photo shows the fabric auditioning process.  


So I made the strip sets and sewed them onto the wall hanging to make a mitered border.


Here it's all laid out with the borders sewn on, ready to be mitered.


You can see a little bit of the diagonal line I drew to mark the 45 degree line, and then I added pins to stabilize it while I stitched it.


The front is finished!!  I did very minimal stitching on this, with a solid line 1/4" inside the white border, and some wavy stitching (#4 on the Bernina) in the outer blue border.  I may return to it and use blue thread to make a hand-quilted circle just outside the white embroidered circle.


Here it is all put together.  I debated about blue or black for the binding, but chose black to make a good stopping point for the eyes.  Now it is all ready!  I even have the label and hanging sleeve sewn on!!


Wednesday, June 1, 2016

Sunbonnet Sue In Gualala

My guild's 2016 challenge theme was about taking something from the past and bringing it into the present or the future.  And since this is our 20th year as a guild, there had to be 20 of something in each quilt.

My Tuesday quilting group decided to use Sunbonnet Sue to start with, as she is a rather old-fashioned quilt pattern.  Then we added certain touches to modernize Sue.  We brought her to our town of Gualala, California!


This shows the section of the challenge show where our group of quilts was hung.


 I saw this pattern in a SBS (Sunbonnet Sue) book, and just knew that I had to make it!  Isn't she funny!  And also brave, as the water is very, very cold here.  There are 20 small real shells sewn onto the beach fabric.


Another one of mine, Sue standing on the bluff top.  It can be very, very windy here at the edge of the ocean.  Hard to see, but there are 20 little tufts of grass embroidered onto the green bluff.


This is Sunbonnet Sue watching migrating whales.  Look at the cute ruffle on her dress.


Sunbonnet Sue at the Yoga Studio.  Twenty different poses of Sunbonnet Sue doing yoga!  I wonder how she keeps her hat on in some of those poses!


Sunbonnet Sue is neighborly.


Sunbonnet Sue watches the sunset.


Sunbonnet Sue goes shopping.  Pay N Take is a local once-a-month charity re-sale market.  Everyone in the whole community goes there to shop and socialize!  It's really quite fun.  And Sue is, of course, carrying her reusable fabric shopping bag.


Sunbonnet Sue walking her dog.


And another one of mine, Sunbonnet Sue Makes a Quilt.  There are 20 squares in Sue's quilt.  The quilt and the curtains are 3-D.

It was so much fun making these little quilts.  It's nice to be a part of a group making an entry into the  challenge show.

Sunday, May 11, 2014

Guild Quilt Show 2014 "Quilt The Music"

Our guild's annual challenge show (PPQG) was on exhibit last month.  The challenge this year was to take a piece of music and make a quilt to somehow illustrate it.  I entered three quilts.

This first one is small, about 11" square.  I belong to a small group and we all decided to make small wonky houses and use the "Little Boxes" song as our theme.  We had ten quilts to enter, and the lower right hand piece in the photo above has the words to the song printed on it.

I was assigned the color pink, so thats my little house right in the center.  It was fun to make--totally free form, no pattern.  It's not very visible, but I embroidered a little flower at the lower left, and that's a button green watering can near it. 

We all agreed to price our little quilt-lets at the same price ($25.00).  Several of them sold, including mine.  We'll be rolling in the money now!

The next quilt I entered was a baby quilt.  I blogged about this quilt here.  It is one of my favorite designs:  half-square triangles made from Bear Patch Bits fabric squares.


For the challenge I chose the song "Hush Little Baby Don't You Cry," and titled the quilt 
"Go To Sleep."

And my third quilt was a Quilt of Valor that I recently completed.  Since I had it available, I decided to enter it into the challenge using the song "Stars and Stripes Forever."  I named the quilt "Brave and True."

I'm afraid I don't have a "whole quilt" photo to show you right now, but here are some process photos.  Trust me, it really is finished!  I blogged about it previously here, while I was working on the quilting.  The top was made by the mother of a friend of my SisterStitches.  The mother passed away before she had the chance to finish this quilt.  I ended up with the quilt top and feel honored to finish it for her.