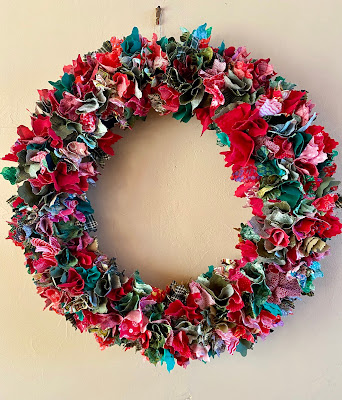
I made a new Christmas wreath last week. I got the idea from a wreath I saw at my local quilt store, The Loft, in Gualala. I saw it in the store a couple years ago, but one thing and another (including a broken arm!) got in the way of my finishing it. Here's how I made it:
Tools you need are a chopstick (or 2) or a pencil, a straw-wrapped wreath form, some glue, and quite a few fabric squares about 3" by 3". I rough cut my squares with a wavy blade to reduce fraying.
This glittery, glow-in-the-dark glue will be wasted here! But it was handy.
You will actually need many, many of these fabric squares!
I do not know how many squares I cut. I was keeping track of the count, just for fun (?), but I can't find the little paper with my count on it. If I find it I will amend this blog post.
Here is the process. The pencil or chopstick needs to be sharpened but not too sharp. You don't want it to poke through the fabric, but it needs to be sharp enough to poke into the wreath.
Center the chopstick in the center of a piece of fabric, then dip the fabric-covered point into a little glue. Push the whole thing into the wreath form. And carefully pull the chopstick out.
Repeat.
Repeat.
Repeat.
Just keep filling in the spaces until you don't see any more of the wreath.
You can see that I left the plastic covering on the wreath, but I did remove the label! I suppose a styrofoam wreath might have worked as well--I haven't tried that.
And here is the final result. I'm very happy with it.


No comments:
Post a Comment