Wednesday, October 26, 2011

Fabric from Stitch Simple


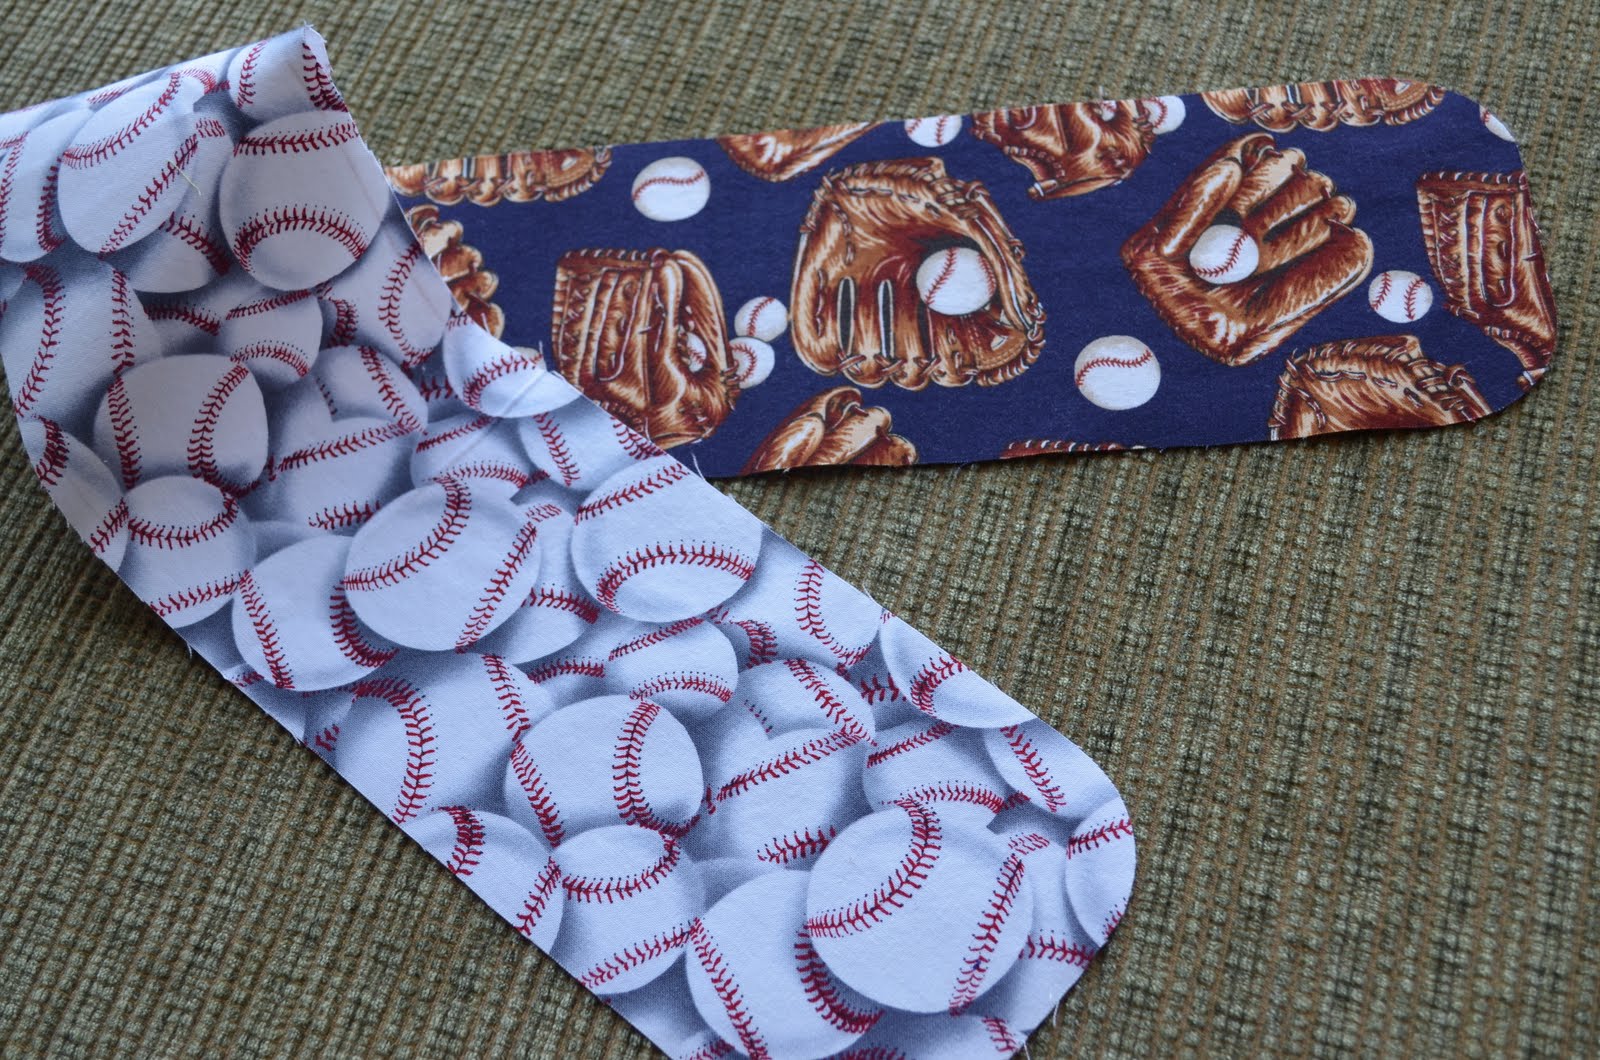
Look at the lovely fabrics I received in the mail from Stitch Simple!! Run on over there and check out their website. They sell pre-washed, pre-ironed, pre-cut fabric. Isn't that cool!?! I am one of those quilters who subscribes to the Alex Anderson school of washing fabric before I use it. So it's really neat to receive a package of fabric and have it all ready to use. As well as cut into squares for me so I don't have to!


My package contained reds, whites, and blues. I ordered an equal number of whites, and reds/blues. I'm thinking of half square triangles with a white and a color in each square. And you may have guessed it, I'm planning on making a Quilt of Valor, which will go to a wounded serviceman or woman.


And how did I come by these lovely fabrics? I won them! Yes, I did. From the Green Bag Lady, who had a giveaway on her blog, in conjunction with Stitch Simple.

Seriously, go check out Stitch Simple, as they have some lovely fabrics. They are not all in 5.5" squares, as mine are. They have different sizes of pre-cuts, also fat quarters, skinny quarters, 1-yard cuts, etc. And, they have a lot of lovely organic fabrics from Harmony Art.

Saturday, October 22, 2011

Art in the Redwoods 2011

I'm afraid I'm very behind with my blog posts. Art in the Redwoods happened in August, and I told you that my quilt earned 2nd place here. Now I want to finally show you another beautiful quilt that won the first place ribbon.


First place was won by Jo Dillon, a quilt she called "Turkish Delight." My poor photo doesn't do it justice. But you can see the intricate piecing and beautiful shading she used. Jo makes really incredible quilts.


And, once again, my quilt, "Somewhere Over the Rainbow," which won second place. SisterStitches quilted this great big quilt for me.

Tuesday, October 18, 2011

Christmas Crafts E-Book

Remember when I posted this ages ago? It was an idea I had (and produced) for Christmas cards using triangles of green print paper AND green print fabric.

I was very excited recently to be contacted by All Free Christmas Crafts as they wanted to link my little tutorial to their website. In fact, they put my project into an e-book about Christmas crafts. Go here to download this free little e-book with a tutorial by Yours Truly.

I know it's not exactly the big time, not published in physical book form, but it's a start.

I might be making some more of these cards for this year, as well as some matching gift tags. I still have some left over triangles all cut out!

Friday, October 14, 2011

Making Greeting Cards


The other day I spent some time making cards. My supply was very low. It's always a nice change of pace to sit down with glue and paper. Here's what I did.


First some simple cards covered with hand-made paper.


While in an antique shop, I bought some vintage postcards. I thought they looked nice framed with a different hand-made paper.


A few cards made simply with silk flowers that I cut from their weird plastic stems.


And a few Christmas cards. If you are on my list, don't look at this last photo!


Saturday, October 1, 2011

Did You Unplug The Iron? -- Tutorial


This photo is how I left this post quite a few months ago. It was an applique project I was trying, so I would have something to remind me to turn off the iron when I'm done sewing at the end of the day. I had no idea it would take me so long to finish the project, and then to get around to blogging about it. "sorry"


Here you can see that I started sewing down the first piece of the iron, the blue piece. I didn't need to sew down the left side of the blue piece. I just left it a raw edge, as I eventually covered it with the next piece of fabric. I really love those small applique pins. They don't get in the way as much as larger pins when making the applique stitches.


For embroidering the letters, I just turned to my computer. I tried out several different fonts till I found one that was just right. I felt this font would translate into embroidery pretty well. I liked the hand-written, almost scribbly look to it.


After I added the embroidered letters, I decided to add a few more little lines of embroidery, just to liven up the piece a bit (the heat lines beside the iron, and the steam lines coming out of the top). Then I added the yellow border pieces, and did a little hand quilting around the edge of the iron, and just inside the border.


Here it is, finished and bound with the same yellow fabric.

Now, I know we are not supposed to point out our mistakes to others. But I want to tell you what I learned in this project.

1. Finish all aspects of the picture portion before embroidering on the words, so that the words will be centered!

2. Also, always use a backing layer under the embroidery fabric. That can be interfacing or simply a piece of muslin. This will help a lot in hiding the tails of your embroidery thread, especially if you're using a fairly bright blue on simple unbleached muslin!

I really like my little hanging. It only measures about 7 inches wide, so it doesn't take up much space next to the door of my studio.

Cell Phone Holder


Hi! I recently made this cute little cell-phone holder for myself. I should have done this several years ago. I know. And I should have this several months ago. I know. Better later than never?

MisterStitches and I go to a lot of baseball games. I never take a purse with me, because I don't want to have to keep track of it. But I do need a few little things with me. I use pockets when I can, but now I have this nifty little bag to hold just a few things.

Courtesy of SisterStitches, I used a pattern from Quiltsmart. (We all want to be smart quilters, right!?!) This cool pattern comes printed onto fusible web. How smart is that! In the photo below you can see that I've ironed the fusible pattern onto my fabric. It also gives instructions on how to use two different fabrics, one for the outside and one for the lining, if one so chooses. You can see all the cutting lines and folding lines printed right there.


Here you can see the two different fabrics that I've chosen for my little bag. Inside and outside.


Per the printed (on paper) instructions, I am now folding one line to meet another. All perfectly spelled out for me.


And this is what I created. You can see that it's only about 6" tall.


Because of the folds, inside are two separate pockets. Just a good size to hold my phone, some money chap stick, a credit card.


And here it is on me. This is how models are supposed to pose, isn't it?