Wednesday, October 30, 2019

"Square Dance" Quilt for Challenge

 This is my original drawing of how I wanted this quilt to look.  I'm not sure what this "progression" of squares is called, or even if it has a term.  But I knew that I wanted my "one red square" to be in the center, and then angle the other squares around it.


The progression of my drawings. . .


. . . to the final drawing, which I took to the copy shop to have enlarged.  


When I brought home my extra large version of the pattern, I traced those pieces onto freezer paper.  I ironed the freezer paper onto the fabric, and cut 1/4" away from the edges to make my fabric pieces.


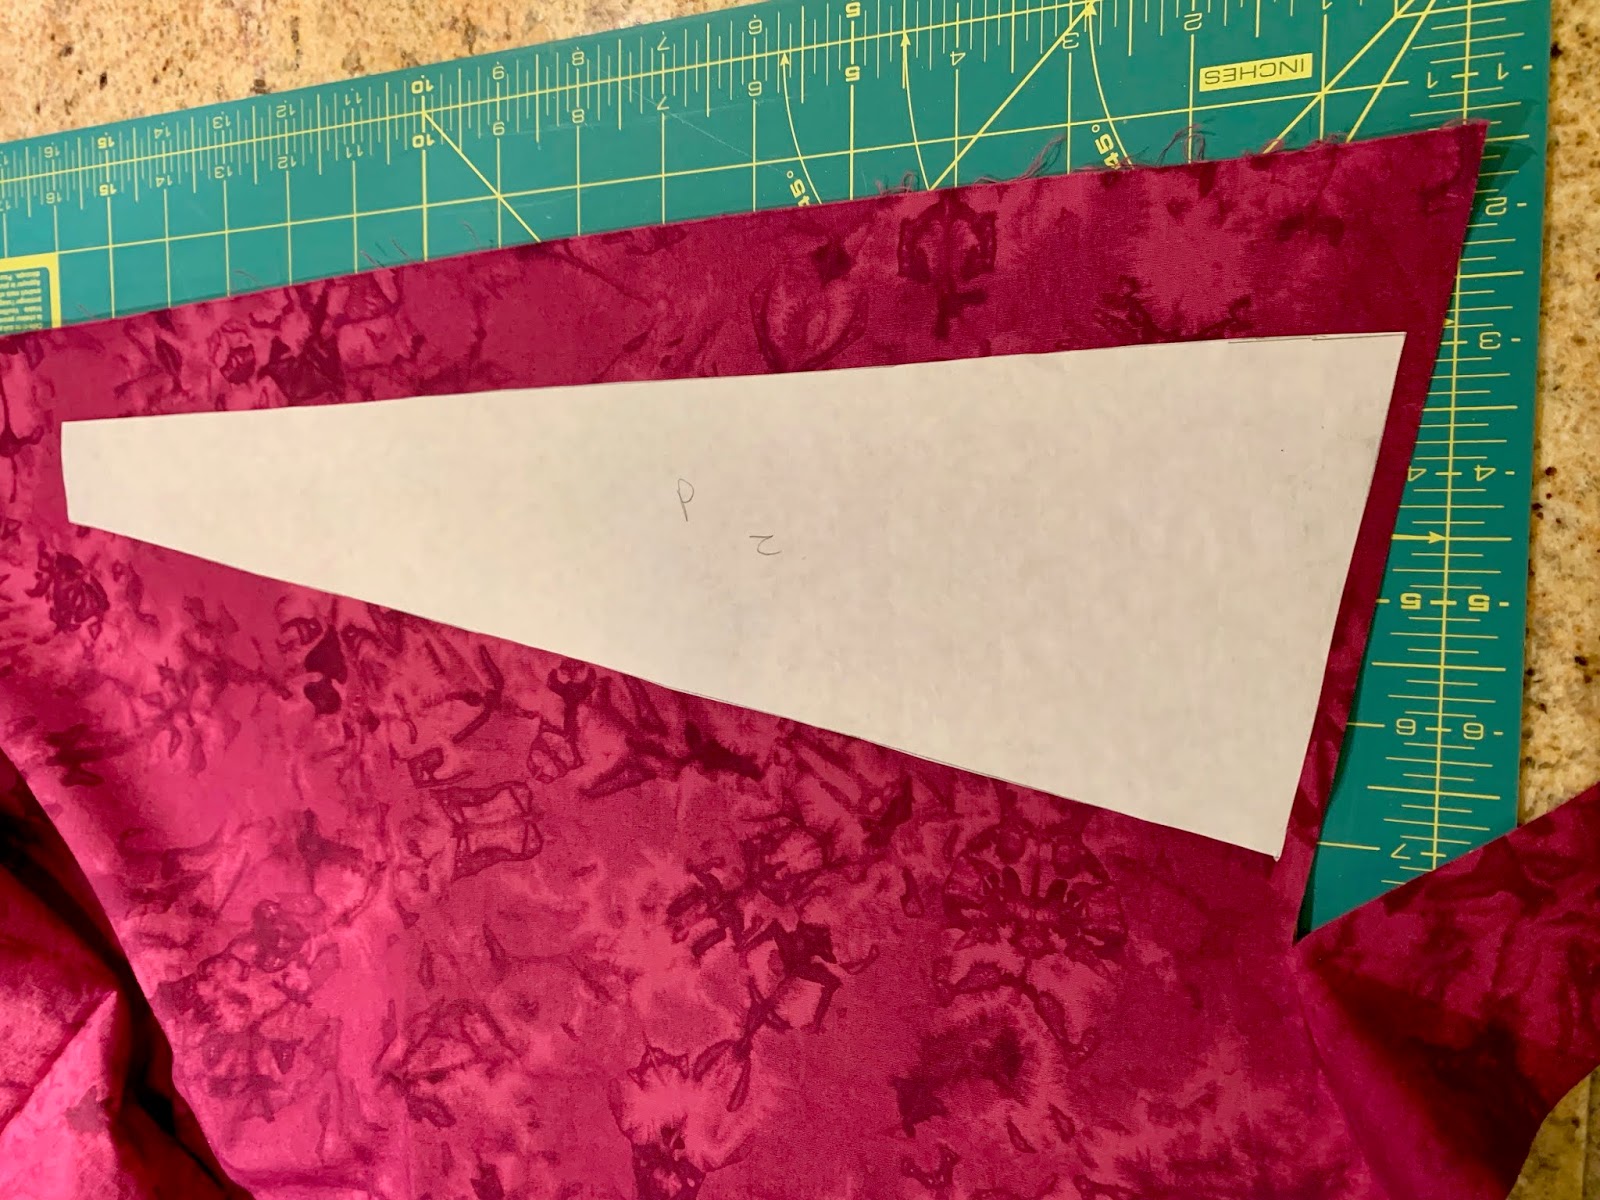
I found that I needed to label the pattern pieces (N, S, E, and W) just to keep them straight to myself.  Theoretically, all of the orange pieces are the same, all of the blue pieces are the same, etc.  But labeling them helped me to keep everything where it was supposed to be.  It's not the easiest thing in the world to sew large pieces of fabric together and keep the freezer paper on them!  The whole thing is about 3 1/2 feet square.


I decided that I wanted to quilt one big spiral on this quilt because it is so angular.  I've always liked the look of spiral quilting, but have never done it.  I searched on Pinterest for instructions and found some good ones.  The source was Flourishing Palms, and the instructions were very thorough.  (Thank you, F.P.!)


I started by drawing around a quarter with a white chalk marker, just as Flourishing Palms directed. Not all of my stitches are perfect, but all in all I'm very pleased with them.


Getting to the bigger, outer circles was a snap!  Frustratingly,  the very center circles were the hardest to sew, and also the first ones I sewed.  And those inside circles will probably also be more noticed than the easier, neater, outer quilting lines.


When I got to the edge of the quilt, I had to lift my presser foot and "travel" to the next corner to get all the corners filled in.


And here is the finished quilt.  I debated about how to bind it--basically I was going between pink binding and black binding.  In the end I decided to do a faced binding.


Saturday, October 5, 2019

"One Red Square" Quilt Guild Challenge

I think I mentioned that our guild's challenge theme for this year is One Red Square.  Anything we enter must contain one red square.  Not two squares or more, just one red square.  I came up with LOTS of ideas for this challenge!  And I carried through on most of them!

There is a large white barn near where I live.  It is the only barn in the immediate vicinity.  And it is called (wait for it. . .) The White Barn.  Every time I drive past it I think, "That barn really needs a barn quilt on it."  So with this challenge, I was able to produce a barn quilt on my very own 
White Barn.  


I used a technique which I have used in the past called Fabric Confetti.  I took a class a few years ago at Asilomar (Empty Spools) from Denise Oyama Miller and Nancy Ryan.  Here's the process in a nutshell.  First I cut the fabric pieces into "confetti."  Fast back and forth with the rotary cutter accomplishes this.  The backing fabric and batting are laid down on a surface, and the colored confetti pieces are laid onto the batting to form the picture.  

When that is finished, a layer of black tulle is (very carefully) laid down on top, being careful not to move the fabric pieces.  Then it gets safety pinned really, really close together to baste it all and to hold the tiny pieces in place.

The next step is to stipple the * out of it, using invisible thread.  That holds everything in place.  Here you can see the quilt in the midst of being quilted down.


After I did that, I laid down the white fabric pieces for the barn itself.  In the photo below you can see that I've made some "barn board" lines in the barn, as well as tiny stippling.


When that was done, I had some fun laying down brown tree trunk pieces amidst the greenery.  I added a fence, which appears in that part of the scene.  I had the very edges of the quilt turned over and pinned for two reasons.  One is so I didn't "leak" any more pieces of fabric onto the floor!  There was already enough of that!  And the other reason is to minimize the risk of getting the edge of the quilt folded over underneath where I was quilting.  Yes, I did do that, and had to rip out some very dense quilting I had done over a tree trunk.


This is just a tiny sample of what the floor looked like, as well as the clothes I was wearing.  Little tiny fabric pieces everywhere!


Here's a close-up of part of the barn, where you can see the two slightly different colors I made the barn to give an impression of shadows.


I created some pink "Naked Ladies" and yellow dandelions and tall grasses in the foreground.  Naked Ladies are properly known as amaryllis belladonna.


Friday, October 4, 2019

A New Comforter Cover

Our comforter cover was really, really showing its age (don't we all!!), and I knew it had to be replaced.  Several years ago I had sewn this strip of blocks together, because I wanted to understand the process.  Here are the basic instructions for making this type of strip.  It has hung around for quite a while, patiently waiting to be used.


It worked perfectly as a "strip of interest" on a comforter cover.  (Is this supposed to be called a duvet? Or is the duvet the comforter that is inside?  I'm really confused by these words.)  I used a spare sheet that I had, and after measuring carefully, I just top-sewed the strip to the sheet. 


You can see that I used the top of the sheet for the bottom of the comforter cover, so it has a nicely finished hemmed edge.  I hand-sewed extra-large snaps to the bottom of the cover to close it.