Showing posts with label scarf. Show all posts

Wednesday, August 1, 2018

Hand Stitching On A Scarf

Way back here I talked about the scarf I started with a piece of shibori dyed silk.  I decided that I finally had enough of the sashiko-style stitching on it, and was ready to finish it.

I used a quilt binding to enclose the ends.  However, I cut the two strips only 1 1/8" wide, because I neither needed nor desired a sturdier binding.  I ironed over 1/4" along the long side, and folded over the short ends.  

Then I sewed the unpressed side of the strip to the end of the scarf. . . 


. . . and ironed it over the cut edges.


Then I simply folded the binding over the raw edge and hand-sewed it down.


All finished! 


I am fortunate enough to have GranddaughterStitches here to model the scarf for me!


 The final dimensions are 21" wide by 64" long, a pretty good size for a scarf.

Thursday, July 12, 2018

How to Rip/Make a Scarf

Directions for Making a Scarf

1.  First, acquire at least 2 yards of fabric.  Up to 2 1/2 yards.  Maybe 3 yards if you are very tall.  I've never used that much fabric.  This will make two scarves.

Caveat one:  The type of fabric bought really makes a difference.  Usually regular quilting weight cotton won't work real well because it doesn't drape very nicely.  Finer, softer cottons work much better.  Those are the fabrics that feel ultra-soft/smooth when you caress them.  (We all caress fabric, don't we?  I hope I'm not the only one?)  It's because they have a higher thread count than quilting cotton.  Some fabrics from Italy, and as you'll see, London are made like this.  The downside is that they usually cost more than regular quilting cotton.  But the good thing about this method is that two scarves are made in the process.  One for you and one for a friend.  Also, it is really a plus if there is very little color difference between the front and back sides.  Because both sides will be showing in this scarf.

Caveat two:  Caveat one is not a hard and fast rule.  I have made a few scarves, as you will see below, that were made from slightly heavier-weight fabric.  Sometimes one gets lucky!!

Now, continuing with the "sewing" instructions:

2.  Make a small snip with a scissors and rip off each of the selvedges.

3.  Make one more rip down the exact center, in the same direction (lengthwise), which will rip the fabric in half.

4.  Now there are two scarves.  To add the finishing touch, wash and dry on normal settings.  Do NOT iron.  Any slight wrinkles will just look natural, like they belong.  Usually the long edges will curl a little bit around on themselves and the short ends will fray slightly.  Remove any long threads remaining.


This scarf is a very lightweight, soft cotton.  You can see below how nicely the ends have frayed.


And here you see how the lengthwise edge has created folds on itself.


This scarf is an exception.  It is a solid, quilting-weight cotton.  But I wanted to try it because it was such a great fabric!  Those little squares are sewn onto the black fabric, not merely printed on.


The edges folded over nicely. . .


and the ends frayed well, too.


This is a Liberty cotton lawn fabric.  Its basic gray/white color scheme really appealed to me.

And it drapes very nicely.


This is the first scarf that I ripped!  I remember buying it, though it was quite a few years ago.  I was in Britex Fabrics, and I really wanted some orange fabric so I could make a scarf to wear to Giants games.  (San Francisco Giants colors are orange and black.)  I was incredibly lucky to find this in the remnant section.  


This fabric is kind of gauzy, and was rippled when I first bought it.  It rippled even more after I washed it.


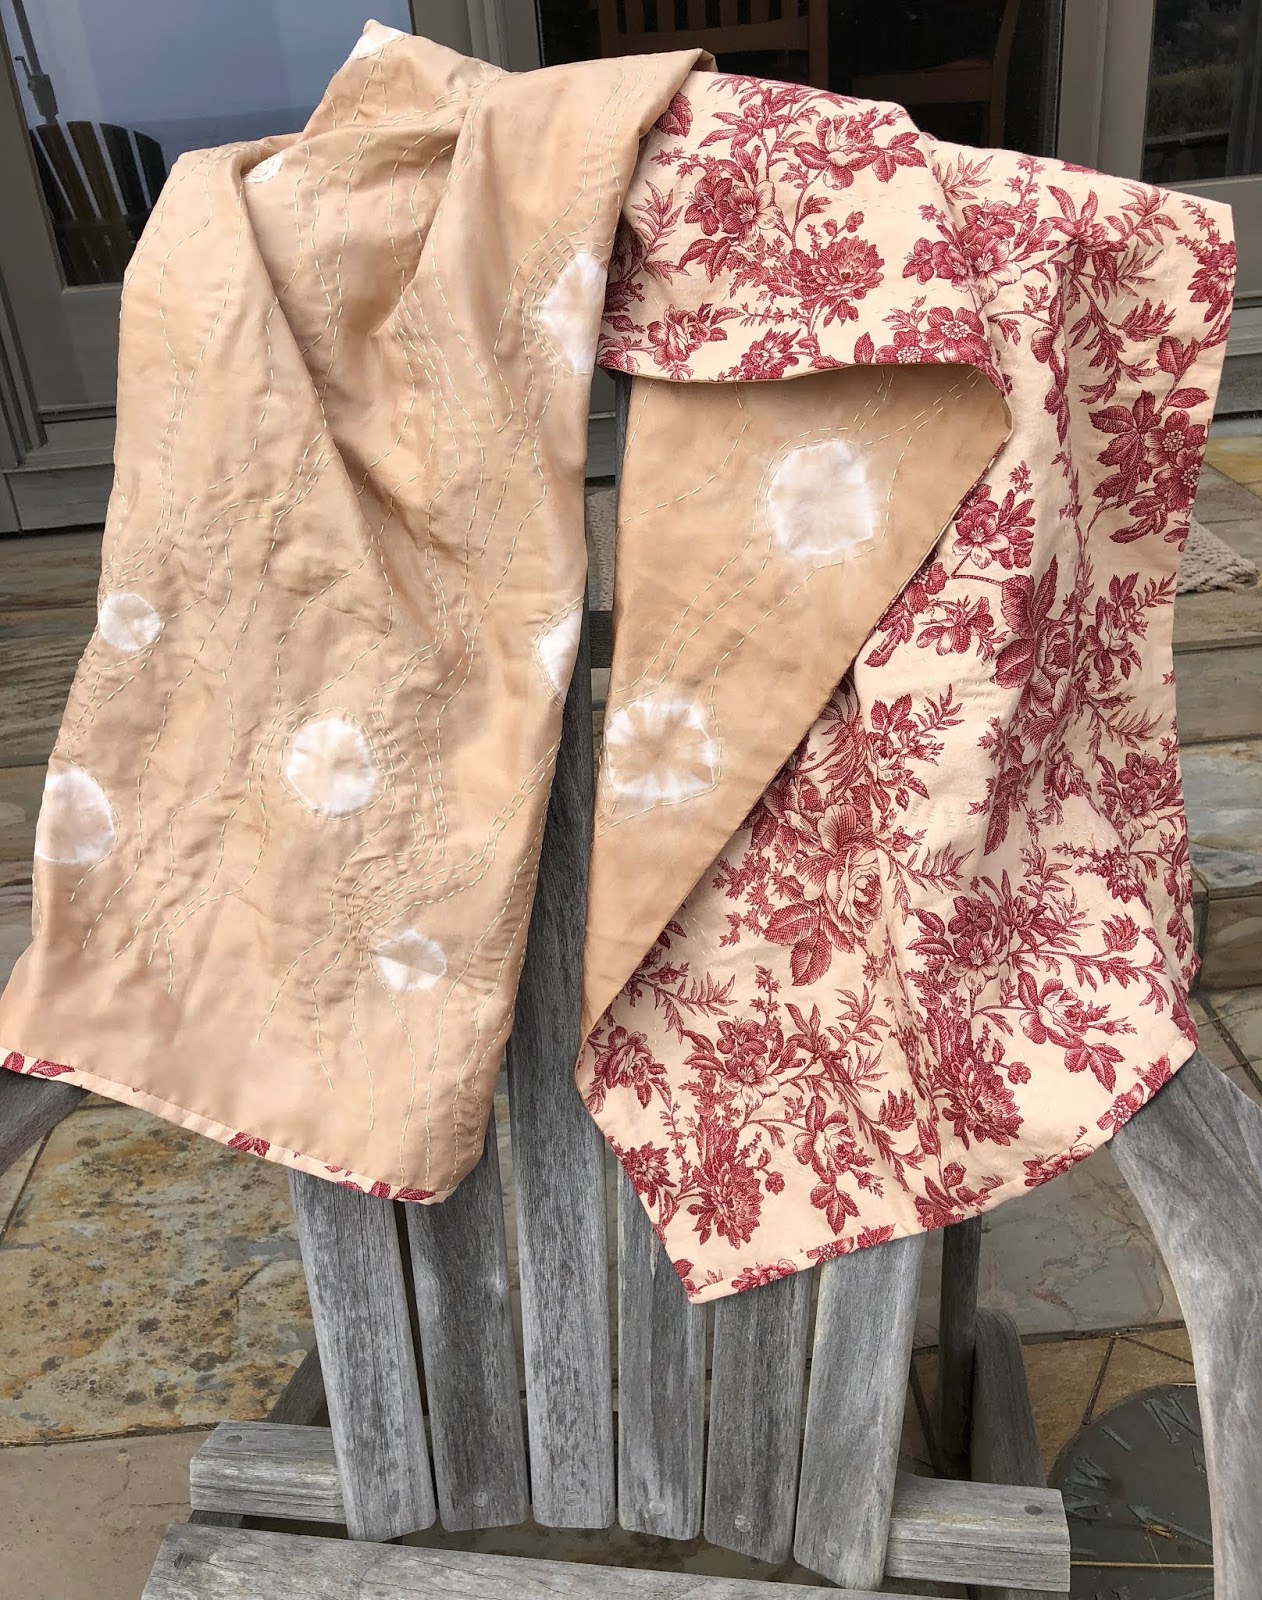
This lovely blue print is an Italian cotton, I believe.  It has a higher thread count than regular quilting cotton.

I was lucky that there is very little color difference between the front and back sides.  The front side of the fabric is shown on the left side of the photo below, and the back side is showing on the right side.


This is another fabric where I was lucky!  I think it might be called a shot cotton.  Not sure, but it's a fabric with the design woven in, rather than printed, so the colors are usually the same on both sides. And this is a regular quilting weight fabric, but it worked well.

The edges folded over--kind of wonky, but it's ok!!  There are always a few threads needing to be pulled/gotten rid of after it is washed.


And the ends look great, too!

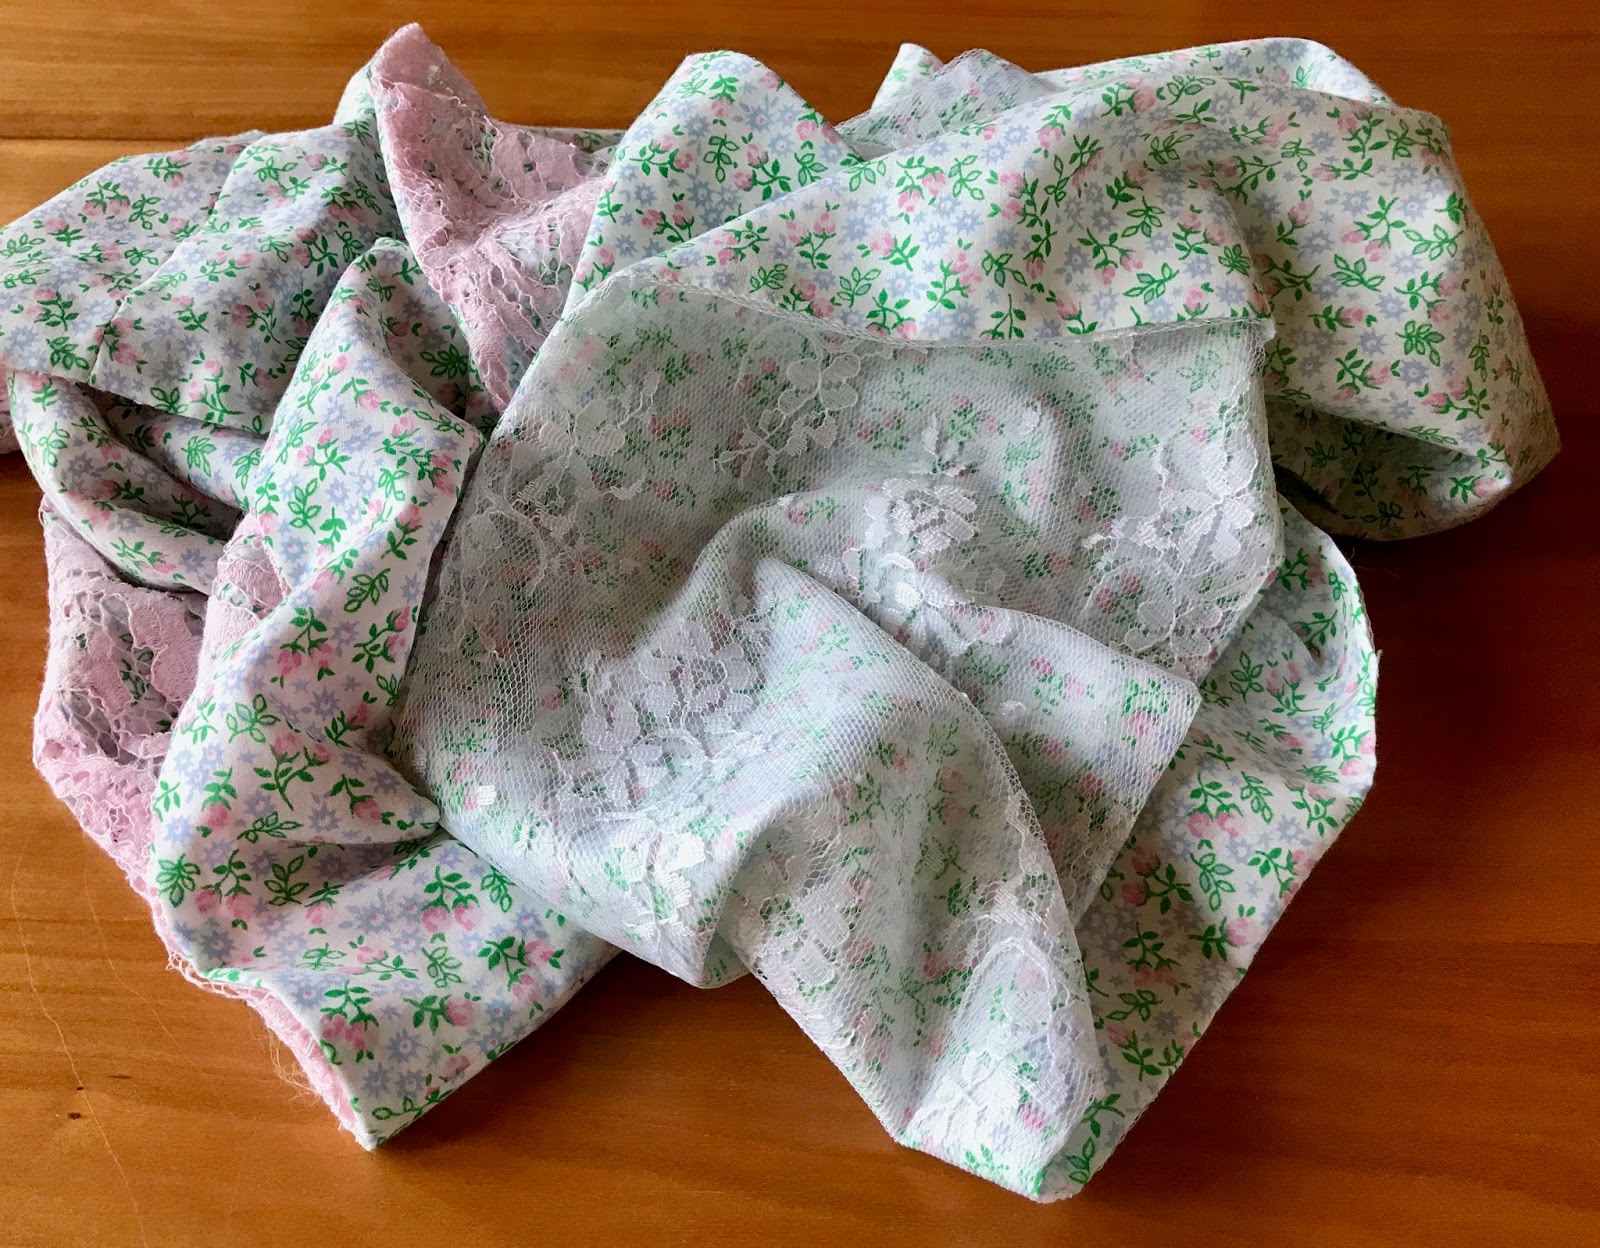
Here is another gauzy fabric--I really like them for scarves!


I'm afraid the colors are a little washed out in my photos, but there are nice, soft pinks in this scarf.


This final scarf is a shear fabric, purchased again at Britex Fabric.  I'm not sure of the fabric content, but it sure has made a nice scarf.

It is very wide; my "half-scarf" is over a yard wide!


The ends (above) frayed nicely, and the long edges (below) frayed well also.

Tuesday, May 29, 2018

Progress on "Sashiko Scarf"

I'm making progress on my sashiko scarf, which I started here.


Using random meandering stitches is a lot of fun!  I can literally just make it up as I go.  I usually pay attention to the dye patterns on the silk, making circles around them.


The tiny red threads are for basting purposes only, and will be removed when I'm finished.


Here's what it looks like on the back.  I think I like it!


Thursday, November 2, 2017

A Logical Progression

As I showed you in a previous post, I added some lace fabric to flowered fabric to make two scarves for myself.  And as there was still lace left when I was done, I think the logical progression is:


A scarf made from the two colors of laces sewn together.


Again, it was a little "futzy" sewing the lace.  I needed to pin carefully (and it's hard to pin fabric that is full of holes!) and again, I used tissue paper underneath for a stabilizer.

I thought of using my little red clips instead of the pins, but then decided against, and toughed it out with the pins.


Sunday, September 24, 2017

Lacy Scarf

I've had a piece of fabric in my stash for quite a while, maybe about twenty years--seriously!  I am so glad that I kept it, because it has now become two separate scarves.


I thought it would be nice to add some lace as part of the scarf.  Both to be decorative, as well as to make the fabric go a little farther.  I had seen this done on Pinterest, so thats partly where the idea originated.


Below is a close-up of the fabric, which is a very delicate little floral pattern.  It also has that really fine feel of some Italian cottons, or Liberty cottons.  It is not, however, a Liberty fabric.  It really is quite old, and was once a full skirt for myself.  (MisterStitches even remembers the skirt!)   I think I added a lace trim to the bottom of the skirt, and might have involved some lace at the waistband.  I loved that skirt!


So here are the two scarves, one made with pink lace and one made with white lace, because I just could not decide.  I did have some trouble sewing the lace.  With my first attempt it gathered terribly.  So I put out a plea to my quilt guild, asking for help.  Right away I had several responses, several of which suggested using a stabilizer of some kind.  (Really, I should have thought of that!  Rookie mistake!)  Using the paper stabilizer fixed my problem and made the scarves turn out well.


As soon as I moved the chair to take these photos, KittyStitches had to jump up on the chair to get in the picture, too!


There is actually a little bit of cat tail on the left side of the photo below!


Sunday, September 3, 2017

Scarf From A T-shirt


I saw a post on Pinterest about making a scarf out of a t-shirt.  (Here)  Then, when a friend (thank you, GS) offered me an unused t-shirt, I grabbed it up!  The directions are good, as well as simple.  

I simply cut crosswise strips (about 1 to 1 1/2" wide).  I used only the main part of the shirt, from under the arms to the bottom, but not including the bottom hem.  Since I broke my arm in May, I still don't have enough strength in my left hand/arm to hold down the ruler, which means that I can't use my rotary cutter.  So I had to use a scissors.  The only downside to this is that some of the strips had little jags or jogs on them.  But I don't think it's very noticeable.

Then came the fun part.  I stretched out each and every "circle" I had cut.  That makes the strips curl up into little rolls.


I took six of the strips and braided them together into two braids.  


Then I simply gathered them all up together.  For the "fastener" I cut some of the t-shirt fabric from an unused sleeve.  The braids got loosely sewn by hand into the bunch of rings.  


Then the fastener got sewn shut, enclosing all the loops and the ends of the braids.  Now I'm thinking if I had made the fastener a little prettier (maybe no raw edges showing), that would make it feasible to wear the scarf with the fastener partway down the side.  For another look.

Back side of the "fastener."

And here is my scarf.  I was actually wanting to make a scarf in a neutral tone, so this really worked for me.  


Sunday, January 31, 2016

Some Crocheting For Myself


I don't normally crochet what I would label as "clothes" because I haven't found many crocheted items that I have liked enough to wear.

But then I saw this crocheted scarf cowl pattern in a friend's magazine, so I decided to give it a try.


And I quite like it.  It is very cozy around the neck, keeps me warm on these chilly days.  (My midwest relatives probably think I'm silly when I say we have chilly days here in northern California, but we really do!  It's all relative.)

The pattern is so simple, too.  Just eight rows of double crochet, using four strands of yarn at once.  The first one was so easy, I decided to make another!


This one is a much brighter color, and I found some awesome large buttons for it.


Wednesday, July 23, 2014

New Fabric!


I recently came across two finds at Britex Fabrics in the sale section.  I always like to look there, because I can find treasures sometimes!  One time I found a piece of Liberty of London fabric.  Score!

 This time I found the two fabrics in the top picture.  Both are really nice, smooth cottons.  


The striped one--what fun colors are they?!--is an Italian cotton, and feels almost like a shirting weight.  It is 60" wide and there is a little over a yard of it.  I think I will have some fun using these nice stripes in a quilt top.  I'm imagining the stripes with nice coordinating colors.


This very large polka dot is a more sheer fabric.  It is 54" wide and about a yard long.


Doesn't it drape nicely?  I'm thinking maybe a scarf.