Monday, November 23, 2009

Sign of the Times

Here is a sign that is hanging on a street pole in San Francisco.
"THIS IS ABOUT SOMETHING THAT HAPPENED A LONG TIME AGO
THAT CONTINUES TO AFFECT US TODAY"

I have seen other signs there before, with words/phrases that sometimes are funny, and sometimes seem to make no sense (at least to me). They are obviously put up by an individual. I sometimes wonder how many people even notice the signs. Do people assume it's just another NO PARKING sign?

I have several photos of strange signs (in boxes somewhere!) that I have taken over the years. Some with unusual or surprising words, some with strange icons or depictions. I'm fascinated by strange signs.

I decided to try to find out why these signs are here.

It was very easy.

It turns out, not surprisingly I guess, that this is an art installation. The artist's name is Anthony Disenza and you can see a little bit about him, as well as some more of his signs, here.

There is actually going to be a showing of his work at the Catherine Clark Gallery in San Francisco in January 2010. I hope I get to see the exhibit, as I'm curious about this artist, and would like to see more of his work.

And you can bet I'll be there with my camera when I see a new sign go up!
Sunday, November 22, 2009

A New Blogger

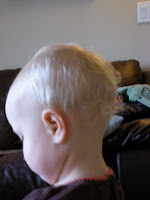
Here is a brand new member of the blogging community. My granddaughter, BabyStitches, has started her own blog. I think she gets a little help from her mom, DaughterStitches.

I have her blog listed on the sidebar of my blog, and you can also find it here. So check out her blog, as I'm sure it will be very amusing. And probably enlightening, too, to those of us who are older than 18 months!

Saturday, November 21, 2009

Results of Wine Dyeing Experiment

Here are my pieces of fabric drying, after I had left them in the wine overnight. It really smelled good when I opened the container holding the wine and fabric! It turned out as I had thought it might, with the white print on the fabric not picking up the "dye," leaving it looking white.


And here is the fabric dried and ironed, a lighter shade than when wet, as could be expected. I like how the long narrow strip has a little variation in color, as it was on top of the pile, so didn't get as saturated with the wine as the other pieces did.


Not sure how the fabric will wash--how much it will fade. I did put them through the dryer, after they had air dried, because usually my wine-stained clothes don't wash out after I've put them in the dryer!

Now I want to experiment with different colored fabrics. And I really like the variegated look, so I'll probably make my next wine-to-fabric ratio a little lower.

Went out for dinner with MisterStitches last night and had a beet salad (I absolutely love beets--I know, people usually either love them or hate them!). I started wondering how beet juice would work to color fabric...

Tuesday, November 17, 2009

Wine Dyeing Experiment


I tried an experiment this evening.
I snitched a little wine from our evening meal, as I wanted to see how it would
color some fabric.


I poured the leftover wine into a
hard plastic container.

Then added some white fabric scraps. I chose
tone-on-tone fabrics, to see how the
different parts of the fabric would take to the "dye." Here are the fabrics I used,
in the "before" stage.


And here are the pieces of fabric in the wine. Maybe I'll go put Saran Wrap over the top. Not sure what difference that will make, but it might be better with all sealed in.

I'll let you know how it comes out.
(Do you like my wine-colored text!?!)

I know, some of you will think that this is a terrible waste of good wine (and it really was good!), but sometimes we have to sacrifice for our art. What can I say?

Thursday, November 12, 2009

Scrappy Quilt

I finished the scrappy quilt (on schedule, I might add, but I didn't get around to posting about it till now), and am quite pleased with it.
It was so much fun to put together, and I like its rather crazy appearance.

The above photo shows the quilt after it had been washed and dried, to fuzz all the edges and "wrinkle" the background fabric.

Here's a close-up of part of it, so you can see just how haphazardly the sewing was done! Unfortunately, you can't really see the cute purplish binding I used. I was amazed how much thinking actually went into choosing the binding! (Probably more than the main part of the quilt...) I auditioned quite a few different binding fabrics. Some turned out to be too busy (i.e. colorful), some were too uninteresting, some were too bold. But I finally chose a purple that has several different purples in a print, so it reads almost like a solid.

I was planning to give this quilt to my Guild for a comfort quilt, but a friend suggested that I first put it in our Festival of the Trees booth and see if it sells. If not, then it can be a comfort quilt. Whatever! I just made this quilt for the fun of it, so I don't really care where it goes.

Saturday, November 7, 2009

Very Scrappy Quilt

I'm really getting there with this scrappy quilt!
I referred to it way back in September in this post. I got the idea from the blog by crazymomquilts.blogspot.com. I was so excited to try this idea, but I still have a lot of fabric scraps left!

I did it a little bit differently than crazy mom did, but not much. I sandwiched the quilt top, batting, and backing, then basted it by pinning on the patches. That anchored everything quite well. I started to use my walking foot to sew around the edges of the squares, but that was way too much turning of the quilt around in my machine. The quilt measures somewhere around 40-something inches by 60 inches. That's a lot to push and pull through the machine for 2" or 3" lengths of stitching.

So I switched to the free motion foot,
and just did my best at getting fairly straight lines around the squares. I have to admit that I didn't worry about it too much. And they are not all sewn on perfectly, but that's ok.

If I did it again, I might make some loopy-loops between the squares, so I wouldn't have all those starts and stops to make. But what the heck! I spent some nice quiet time snipping all the threads and taking out a few remaining safety pins. I went outside and sat in the unusually warm sun to snip the thread ends, with just a light breeze, and the ocean waves crashing in front of me.

I have the binding chosen and pressed, so hopefully tomorrow I'll get this baby finished and I can show you the finished product. {Way to put the pressure on, MissesStitches!} Just had a little interruption this afternoon when the power went off for a bit. There wasn't a storm, so I'm not sure why, but my lights got dim, and my sewing machine and iron were idle for a short while.

Friday, November 6, 2009

A New Book


Here is a fabulous book which was recently published. It is by Judith Baker Montano, my guru for crazy quilting. The big surprise is that there is actually a photo in this book of a quilt that Little MissesStitches made! I am so excited about being in this book--it's such an honor. I think I'll buy several hundred copies to give to a few of my closest friends and relatives!

The book itself (even without the fabulous inclusion of my quilt!) is beautiful. It is an oversized book, with a spiral binding, and with beautiful, beautiful photos, almost all of which were taken by Judith. She's a fabulously talented woman, with lots of interests, and is a wonderful person to know and to learn from. The book talks about using different methods for creating a fibreart (as Judith spells it!) montage. In my case, I made a quilt/wall hanging of a landscape scene using crazy quilt piecing, embroidery, silk ribbon embroidery, burning fabric, dying fabric/trims, needle felting, and embellishing like crazy. It was a class that I took from Judith at Asilomar (Empty Spools Seminars), which is a fabulous place to go for week-long quilting classes.

Monday, November 2, 2009

Quilting Design Possibility?


Hm-m-m-m...
Could this be a possible quilting design?

*
*
*
*
*
*
*

It is simply a box of tissues!
But I looked and looked at it, trying to follow a line around, and I think it might work. I even tried drawing it out, and I think it's definitely worth an experiment. I'll have to put it in my "idea book." (That's the collection of little scraps of paper that have all sorts of different ideas, drawings, clippings, etc. It's supposed to be all in one place, but....)

Has anyone used this design? Or seen it used? Let me know!


Sunday, November 1, 2009

Quilt Squares All Cut!


I have all of the quilt squares for my latest project cut now!
Next step is to take them to my design wall and try to arrange them in a pleasing manner.
I can't wait to get sewing! But I really can't start till I get them all laid out.

So here they all are, neatly tied up in a bundle, awaiting my next move.
I'm making this quilt just from a photo, so I'm kind of winging it. I wasn't sure how much fabric I would need, so I bought a half-yard of several different fabrics in a fabric group. I figure that I'll sew them all together, and if it's not big enough, I'll add borders.