Showing posts with label quilting class. Show all posts

Friday, May 16, 2014

Intermediate Quilting Class 2014 (Session Two)

The second week's class was about curved piecing.  A lot of quilters are scared of sewing curves.  And it does take a little thought, but is certainly do-able.  My co-teacher, Kalynn, and I are both garment sewers, as well as quilters, so we are used to handling curves.  

And our students caught on very well.

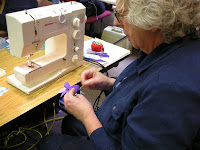
We talked about using templates in this class, when previously all of our blocks were rotary cut using straight rulers.  This particular block is a drunkard's path, and there are also several other names for this block.  I had some acrylic templates for students to use, and we also showed them how to make their own templates out of template plastic. Everyone used pins to secure the two pieces of fabric together, although sometimes fabric glue is used.  Some of us used a lot more pins that others, but it's all good!


 The results were quite good, as you can see by these photos.


Look at how even all these edges are!


The photo below shows how two blocks look when put together.  We talked about all the many different ways these blocks can be arranged.


This next photo shows what happens when you cut with two layers of fabric under your templates and then switch around the pieces.  The top one is a great combination, isn't it.

Sunday, March 30, 2014

Intermediate Quilting Class 2014 (Session One)

A friend and I again taught an Intermediate Quilting class.  We taught it a few years ago for the first time.  Last year we taught Beginning Quilting, and this year we are teaching the intermediate class.  I should state for the record that these classes have been taught for quite a few years, through our quilting guild, PPQG, by some very, very capable teachers.  I've taken both of these classes.  I can only hope that my friend and I can fill their tennis shoes.

We have an excellent group of students this year, 7 in total, which is a really nice number for the class.  Not too big and not too small.

The first week we taught "Y-seams."  Specifically, the Attic Windows block and Tumbling Blocks.


This is the basic attic window pattern.  


When sewn together a nice window pattern emerges.

Tumbling blocks, as you know, are made up of just three diamond shapes, light, medium, and dark.  With the shading, they make a three-dimensional effect, as does attic windows.


I have a little (!) experience with tumbling blocks.  You can see some posts here and here.


 Our students are really great, and catch on quickly.  In fact, we had some extra time after they mastered these Y-seams, so we also taught them a free-form method of making blocks out of just strips of neutral fabric and scraps.  I learned this method from a blog I follow, called Oh Fransson.  I  made a quilt using this method back in this blog post.


One of my "free-form" blocks.

A happy student with her "free-form" block.

I always have fun re-making the blocks for the beginning and intermediate classes before we teach them.  This way they are fresh in my mind, and I'm aware of any steps or procedures that might be confusing to the students.  

Monday, May 21, 2012

Alison Schwabe Class Part II

 Here are some photos of my work from Alison's class, as promised previously.

This first photo shows two opposite samples made by laying two squares, both right sides UP, then making two different angled cuts, rearranging the pieces, and sewing them back together.


This shows my efforts at inserting a pieced strip.  I was trying to see how skinny I could get my strips.  The third one I inserted, the left-most strip, was skinny enough to please me.


This photo shows some more-or-less "stack and whack" piecing, plus some inserted strips and crossed lines.  Look quickly, then go on by, as it's not a good photo!


Then I started working on some actual squares in hopes of assembling a quilt top out of some of them.  My favorite method was inserting strips, so I decided to do those.  To make life easier, I cut a large rectangle of fabric and inserted strips the long way.  Then I was able to cut it in two to make squares.  That's why they appear to be pairs--they are!


Monday, December 19, 2011

Free Motion Quilting Class

I recently took a free motion quilting class at my local quilt guild. It was taught by Bonnie Toy, a very experienced quilter. She has some awesome ideas, and is a good teacher. Bonnie has a wonderful way of getting things across to her students.

Now, if you don't laugh too much, I'll show you some of my attempts in her quilting class. I've done some free motion quilting, but am nowhere near adept at it, and I always need more practice. I take every class I can find, as I always learn something new.

This first example is just a little elongated, three-loop figure eight, then three loopy loops around it. It's quite easy to move around the quilt top with this design.


My second example is a curved loop, but then it is "echoed" in a square manner, rather than with loopy round lines.


One of my favorite designs, and totally new to me, is this one that looks like intersecting circles. It requires drawing a grid onto the fabric, then snaking curves up and down the lines. The result looks like circles. It's awesome, and I am so glad I discovered this design. I now need to acquire the necessary grid, and my local quilt shop has some ordered, so I'll have one soon.


This design--or one similar to it--is know as bananas. However, I didn't make mine quite like everyone else did. But I'm pretty happy with the outcome. Just some random curves.


The above examples are all on one piece of fabric. You can see that the fabric is a very colorful batik print. One day I will do more practice quilting on this fabric and will have a set of placemats!

Thursday, February 17, 2011

Intermediate/Beginning Quilting Class

Today was the second day of the Intermediate/Beginning quilting class that I am co-teaching with my friend, Kalynn. It's a lot of fun teaching these classes (we co-taught beginning quilting last fall).
The students we have are the greatest, eager to learn, and pretty quick to catch on.
See how hard they're working!!!

Hard at it...


Here are some examples of their great work. Above is a LeMoyne star block. Isn't it pretty!?!

[And, BTW, did you know that LeMoyne means "the monk?" The question came up during class, so I looked it up on my iTouch. Amazing what technology can do!]

And here is a log cabin quilt block,

And another beautiful LeMoyne star.