Showing posts with label Tumbling Blocks. Show all posts

Sunday, March 30, 2014

Intermediate Quilting Class 2014 (Session One)

A friend and I again taught an Intermediate Quilting class.  We taught it a few years ago for the first time.  Last year we taught Beginning Quilting, and this year we are teaching the intermediate class.  I should state for the record that these classes have been taught for quite a few years, through our quilting guild, PPQG, by some very, very capable teachers.  I've taken both of these classes.  I can only hope that my friend and I can fill their tennis shoes.

We have an excellent group of students this year, 7 in total, which is a really nice number for the class.  Not too big and not too small.

The first week we taught "Y-seams."  Specifically, the Attic Windows block and Tumbling Blocks.


This is the basic attic window pattern.  


When sewn together a nice window pattern emerges.

Tumbling blocks, as you know, are made up of just three diamond shapes, light, medium, and dark.  With the shading, they make a three-dimensional effect, as does attic windows.


I have a little (!) experience with tumbling blocks.  You can see some posts here and here.


 Our students are really great, and catch on quickly.  In fact, we had some extra time after they mastered these Y-seams, so we also taught them a free-form method of making blocks out of just strips of neutral fabric and scraps.  I learned this method from a blog I follow, called Oh Fransson.  I  made a quilt using this method back in this blog post.


One of my "free-form" blocks.

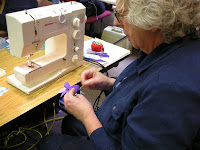
A happy student with her "free-form" block.

I always have fun re-making the blocks for the beginning and intermediate classes before we teach them.  This way they are fresh in my mind, and I'm aware of any steps or procedures that might be confusing to the students.  

Friday, March 30, 2012

Tumbling Blocks Quilt--Progress (?)

I have to admit that it's been quite a while since I've done any hand-quilting on my tumbling blocks quilt. (Bad MissesStitches!) But I did some work on it today, and I vow to work on it on a more regular basis. I know that I just need to sit my little tush down in the chair and do some quilting every day in order to make progress.


I really do enjoy hand quilting, though. It's so quiet and relaxing, in its own way. MomStitches does quite a bit of hand quilting, and I remember my grandmother sitting at her quilting frame stitching away. So it makes me feel a little bit connected to them when I am hand quilting.

I took the quilt off the frame today and laid it over the bed to check out just which parts I have done. Happily enough, I've got a good-size chunk finished right in the middle. Which is what I had planned to do, but you never know! As I get closer to the edges, that will mean less fabric hanging over the edges of the frame, therefore, less fabric to reach underneath and have to support with my left arm.


Did have one little hiccup this afternoon. I've been using this hard plastic (?) (rubber?) thimble for quite a while (below), and have been very happy with it. Recently, however, I've noticed the eye end of the needle sometimes sticking into the thimble. And today I saw that the very end appears to have some holes in it. Maybe the rubber has disintegrated a little bit. Not sure.


That caused me to pick up this thimble (below) which I have used a lot, too. It's particularly good if your nails are just a little bit long, as there is room for the nail to extend beyond the thimble. Also, with its openness, your finger doesn't tend to get too moist if it's a warm day. This thimble felt very light and unobtrusive on my finger, after the rubber/plastic one.


Thursday, February 17, 2011

Intermediate/Beginning Quilting Class

Today was the second day of the Intermediate/Beginning quilting class that I am co-teaching with my friend, Kalynn. It's a lot of fun teaching these classes (we co-taught beginning quilting last fall).
The students we have are the greatest, eager to learn, and pretty quick to catch on.
See how hard they're working!!!

Hard at it...


Here are some examples of their great work. Above is a LeMoyne star block. Isn't it pretty!?!

[And, BTW, did you know that LeMoyne means "the monk?" The question came up during class, so I looked it up on my iTouch. Amazing what technology can do!]

And here is a log cabin quilt block,

And another beautiful LeMoyne star.


Friday, January 28, 2011

Hand Quilting Frame

I had a couple very large packages waiting for me the other day when I got home. It was the quilting frame I'd ordered! It seems that whenever I order something, I want it to arrive later that same day! I'm always so anxious to receive it!


It was no different with this quilting rack. I managed to get it all set up and put together by myself, and now it's all ready to use. There sure are a lot of adjustments on it: higher, lower, more slanted, less slanted.

Now my tumbling blocks quilt is installed on it and I'm ready to start quilting. I finally got all those little seams pressed down (with only a few small burns on my fingers). And I have given up any notion that this is a portable project. Now it will just sit at home (for years?) while I hand quilt it.


With my little arsenal of tools set up beside me, I'm ready to go!

Thread snippers
Thread
Thimble
Needle threader
Thread Heaven conditioner
Rubber disc to pull needle through

* * *

No, wait a minute.
Now I'm ready to go. Gotta have that (non-greasy) hand lotion nearby!


I really love having the quilt set up for me to work on. It's so easy to go into that room and quilt for just a few minutes or for a half hour. Nothing to set up or put away. It is placed in my guest room, and I can watch tv while quilting if I want. Looking up occasionally helps keep me from getting a stiff neck.


Saturday, January 8, 2011

Tumbling Blocks


I finally finished sewing all the rows of my tumbling blocks quilt top together! It now measures 82" by 90." It consists of 426 hexagonal shapes, sewn together from 1,278 diamond shapes. Whew!!

Now comes another fun part! With the quilt top up-side down, I need to iron all the seems on the back sides. Especially to get all those intersections to lie flat.

With so many short seams to iron, I'm using my Clover craft iron. Because a regular iron would be just too clumsy to maneuver these small seams.

Oh. My. Goodness. This. Is. Tedious.

After I iron a section with the craft iron, I go over it again with the regular iron, because I feel that the bigger iron will give a better overall press.

I've discovered that this is work which can easily produce a very stiff neck, if done for too long at a time! So I try to iron a bit, then take a break and do something else for a bit, then back to ironing for a while, then another break. Whose idea was it to make this quilt so big, anyway!?!?!?

Here is the fabric I bought for the backing fabric. It's extra-wide fabric (110"), so I won't have to deal with a seam anywhere in the back. Yes, I'm sure that will make this whole project much easier!!!
?????

Thursday, September 30, 2010

Houston, We May Have A Problem

I am making good progress on my tumbling blocks quilt. I've sewn 18 rows together, and only have 5 more rows to go. :-)

However...

I laid it down on the floor the other day and, correct me if I'm wrong, but this quilt top is looking a little out of proportion to me. As in wider than long. And I'm almost done sewing on the horizontal strips.

Right now it measures roughly 88" wide and 74" long. It's a little hard to measure rows because one row doesn't line up exactly with the next row. Rather, they are offset a bit. But five rows in the quilt measures about 20". So when I finish sewing these last five rows on, that gives me a quilt top 88" wide and 94" long. Which is a bit too close to square for me.

I know the easy answer is just to turn it sideways. But it has always seemed "right side up" to me like this, and I would always feel it's sideways.

I'm thinking I have two choices, but really just one. (!) Choice one would be to sew up some more hexagons and make more rows. The problem with this method is that the fabrics wouldn't necessarily be mixed up in the same way, and I'd hate for it to look like it had extra rows tacked on after the fact.

So I think my only choice is to remove some of the blocks (maybe one or two) from the end of every horizontal row, and sew them into more rows to make it longer.
I wasn't planning on adding any borders to the quilt.

What do you think? Any suggestions? I need some help on this, please...

Sunday, September 12, 2010

What to Title This Post?

I know it's been a long time since my last post. I've been very busy sewing. One of the things I've been doing is sewing together my tumbling blocks. I keep plugging away at it, getting more and more rows added.

Took it to my new Wednesday sewing group. It's getting bigger and bigger. Someone asked me what size quilt it was going to be, and I had to say that I don't quite know for sure!

A thought just occurred to me, however. Maybe I should make this into a comforter cover instead of a quilt. We don't really use quilts on our bed, but do use comforters. Something to think about...

Monday, July 19, 2010

Disneyland

We've had a great trip to Disneyland! We went with BabyStitches, her parents (DaughterStitches and
S-I-LStitches), and SonStitches and MrsStitchesJr.

It was BabyStitches' first time there, and as she is just over 2 years old, it was a good time for her. She was very brave and had a lot of fun on the rides, eating snacks, and getting to know the characters.

The first photo shows BabyStitches with her Daddy and her Papa.


Here is BabyStitches trying to pull the sword out of the stone with her proud uncle. Come on--pull a little harder!


BabyStitches with her mom on the Dumbo ride--she really had a lot of fun on that one!


Here are SonStitches and MrsStitchesJr. Since they got married within the past year, MrsStitchesJr chose to wear a Mickey Mouse style wedding veil.


I can't wait to go back to Disneyland again!

No sewing to speak about here, except that I did get a lot of hand sewing done on my tumbling blocks quilt on the drive there and back. Keeps me out of trouble in the car!


Sunday, June 27, 2010

Tumbling Blocks Layout Again

I laid out all of my tumbling blocks recently, because I wanted to make sure I had the rows laid out correctly, and I couldn't see any other way to do it.

I made sure everything was laid out in the right order, ready to work on.


I just love how they look when they are all together like this, and can't wait to get them all sewn up. I sewed a few rows together, and unfortunately overdid a bit, as my fingers were quite sore afterward.

The doctor gave me some cream to put on my hands a few times a day. It is like a topical Advil, and it really helps my hands and fingers feel much better.


Wednesday, June 16, 2010

Moving Along With Tumbling Blocks, incl. "A Slight Hitch"

I have moved along to The Sewing Together of the Tumbling Blocks. There are 18-19 blocks in each row. I have only one little seam to stitch up between each block, then have to break the thread and start on another one, so I'm doing lots of starting and stopping. But it's fun going through the blocks again, and seeing some fabrics which I'd entirely forgotten about!

The photo above shows my row of blocks on the ironing board, where every little seam needs to be ironed open.

^ ^ ^ ^ ^
The next photo shows two rows of blocks lain out across my lap. At this point, The Sewing Together of the Rows, I'll be sewing little uphill and downhill seams. For this part I'm using some pins to help keep the corners together in all the right places.
Below you see two sets of two rows I've sewn together, laid out on the dining room table.
After I sewed Row 2 to Row 1, I tried adding the Row 3 blocks individually, without sewing them into a strip first. I found it to be a little more tedious than sewing the rows together first, so that is how I'm planning to continue.

Now I've come to the slight hitch. I'm not sure that I have my rows in the correct order. Because they do not resemble the original photo of all the blocks lain out on the floor. Not sure why this has happened, as I was pretty careful about how I labeled all the rows. I'm still sure that each of the individual rows is stacked in the correct order. But I'm not taking any chances. I'm going to wait till I can lay them all out again, so I can check on things. So for now I'm working at trimming up the blocks with the rotary cutter. And, of course, other projects are always around!

Friday, June 4, 2010

Tumbling Block Quilt--Next Step

I picked up the template I had made at Tap Plastics. (It cost almost $30 to make it, but I figured with as many hexagons as I have to sew together, it would be a good investment to have a template to trim them all.)

Tap Plastics did a good job. Nice, smoothed-out edges, nothing sharp. I love that I can take any kind of odd idea to Tap Plastics and they can make just the thing I need.


So I tried out the template on a couple of my hexagons. It was then that I discovered I didn't have any of the tacky plastic stuff to put on the bottom of the template to keep it from slipping as I used it.

Double-sided tape to the rescue!!! I don't suppose I'm the first person to ever use this as a substitute, but it worked fairly well. I've trimmed about 50 hexagons now, and it is still sticky enough. It's also cheap and easy to replace the tape when I need to.


Another wish in my little mind was that I had one of those turntable-type cutting mats, since there is a lot of turning with all this trimming. I live near some great fabric stores, but they are not your average quilting store (nor a Joanns) and neither shop carried this type of cutting board.

So I improvised again by placing a small towel under the cutting board. Then I simply spin around the towel, cutting mat, and everything when I have cut all I can reach, and need to turn it to trim the other side.


Here is an untrimmed stack of tumbling blocks (photo on right). There are some points sticking out, and a lot of uneven edges.


After trimming, the stack looks like this photo, everything the same size, with edges nice and even.

I think I will need all the help I can get to make this quilt top without puckers and lumps in it!


And I am left with this nice jumble of confetti fabric scraps! I think
it's quite pretty, and even MisterStitches encouraged me to save the scraps till I get all done. But whatever will I do with them? I suppose I could use wash-away stabilizer and sew them all together to make ????


Saturday, May 22, 2010

Tumbling Block Quilt

I guess it's been about five years since I started hand sewing diamonds together to make tumbling blocks. I know it wasn't long after I joined the Guild, and that was sometime in 2005.

I've been sewing and sewing on these little tumbling blocks, and I've made at least one previous post about them. And about "The Cutting Out Of The Diamonds." I've sewn a lot of them in the car, with MisterStitches driving, when we are on a straight road. (Not Highway #1 up the coast!) And I've taken them along to quilting get-togethers when I need some hand work to do. Also great for watching movies at home.

"The Sewing Of The Blocks" has been very enjoyable. It's kind of therapeutic, I think, just stitching and stitching, not having to think a lot about what I'm doing. (That's because I got them all arranged in sets of three [light, medium, and dark] before I started out traveling/sewing.)
I recently decided that I probably have enough blocks to make into a quilt. I have counted and re-counted them so many times, that I've forgotten how many I have all together.

Yesterday was "The Ironing Of The Tumbling Blocks" to make sure all the seams are going the right direction. And today I began laying them out on the floor, arranging them all so I don't have too many pink ones together, for example. This is not a true charm quilt, where no fabric is used twice. I did not have the patience to find that many different fabrics! But it is a scrap quilt, i.e., made from leftovers.

The above photo shows the start of "The Laying Out Of The Tumbling Blocks." I pushed aside the dining room table and proceeded to use the wooden floor in our "great room" which is where the kitchen and dining room and living room all blend together.
I just love how the three-dimensionality of the blocks shows up!
I started in the middle and kept adding circles around the center as I built up the squares. There is still a good amount of room around the outside, so I can maneuver easily.

Last night I did "The Sorting and Stacking Of The Blocks." I sorted all the blocks into stacks of green blocks, brown blocks, pink blocks, purple blocks, blue blocks, etc. You can see that I've put all these different stacks onto a cookie sheet, which is resting on a towel, so that I could easily drag/push the full cookie tray as I scooted around the perimeter of the quilt, adding blocks and adding blocks and adding blocks...

And here I have finished, I think. There's not much room left to maneuver in the dining room. (I have to grab hold of the counter [out of sight at the left] so I can walk around that side of the "arrangement" without stepping on it.)

Right now it's all lain out measuring 95" x 120." Of course, those measurements are not adjusted for the seam allowances, so it will be somewhat smaller than that.

OK, now that they are all lain out, I've counted them and there are a total of 425 blocks. I have been doing a lot of math today, and I think I've used every little math cell in my brain! I'm trying to figure out what the final dimensions will be! (I need MisterStitches for this. Or should I say, "MisterMath" in this case.) Maybe it will be easier to just "sew and let sew."

My next step, of course, is "The Sewing Together Of The Blocks." I'm going to pick them all up, being sure to keep them in stacks of rows, so that I will be sewing the blocks together in the order I have them now.

I know of a plastic fabricating shop, so I am going to take a drawing of the final size of a block there and have them make me a plastic template so that I can have a "Squaring Up Of The Blocks" before I sew them together.
You know, I almost feel like this is cheating. My grandmother couldn't have done this! But I am not as good of a seamstress/quilter as my grandmother/mother/sister, and I think squaring up the blocks will really help me in the end.
This gives me a chance of my quilt lying somewhat flat when I get it all sewn together!

I imagine that it will take me quite a while to get all these blocks sewn together. After all, I didn't sew together 425 blocks overnight! But I am excited to be onto the next step of this quilt.

I'll keep you posted.

Has anyone sewn together a quilt like this before? Any input would be appreciated.

Tuesday, February 2, 2010

AccuQuilt Cutter

Our quilt guild recently purchased an
AccuQuilt Cutter for our use. It is basically a die-cutting machine which cuts different shapes out of fabric. It's very cool--cutting several layers with awesome accuracy in a jiffy without having to use a rotary cutter. A wonderful machine! The photo below shows the machine plus some of the different die shapes that can be cut. The bottom right-hand diagram is showing how 2 1/2" strips can be cut all in a row.
I used it the other day to cut some diamonds for my Tumbling Block Quilt. I took several stacks of fabric with me over to visit the AccuQuilt cutter. What I came home with is shown below.

I have four different tumbling block sets, with 24 of each of the three diamond colors. That adds up to 288 diamonds. It took me about 45 minutes to cut all these, with no aching in my wrists or shoulders. It's amazing! This is not a power machine; it cuts when I turn the crank and roll the fabric through, with the particular die shape I've chosen, of course. And the crank is easy to turn, too. I had four layers of my fabric lying out to be cut through all at once. It is capable of cutting more than four layers of fabric. I think I've found a new friend!


Above are my two stacks of diamonds, with a playing card to show you how tall they are. This machine cuts like a hot knife through butter!

This many diamonds might actually keep me busy for a while. The pieces are all wonderfully accurately cut, too,which should help with my hand piecing.